My New Cookbook is Out! Check Out Now!
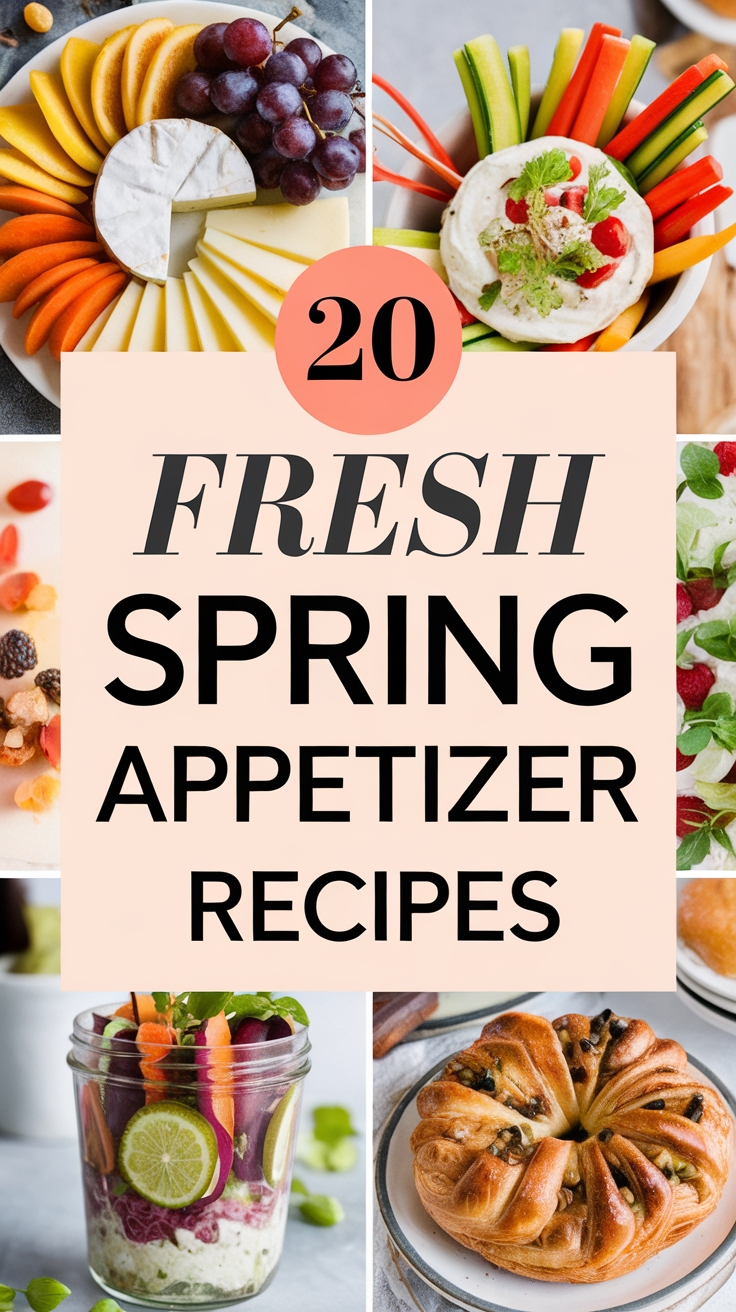
20 Light Spring Appetizer Ideas
With spring just around the corner, are you ready to impress your friends with light and refreshing appetizers? You deserve quick and delightful recipes that brighten up any gathering, without the fuss. Dive into these 20 easy spring appetizer ideas and discover how to add vibrant flavors to your table, making your warm-weather gatherings unforgettable!
Shop Our Must-Haves
1 Citrus-Infused Avocado Toast Bites
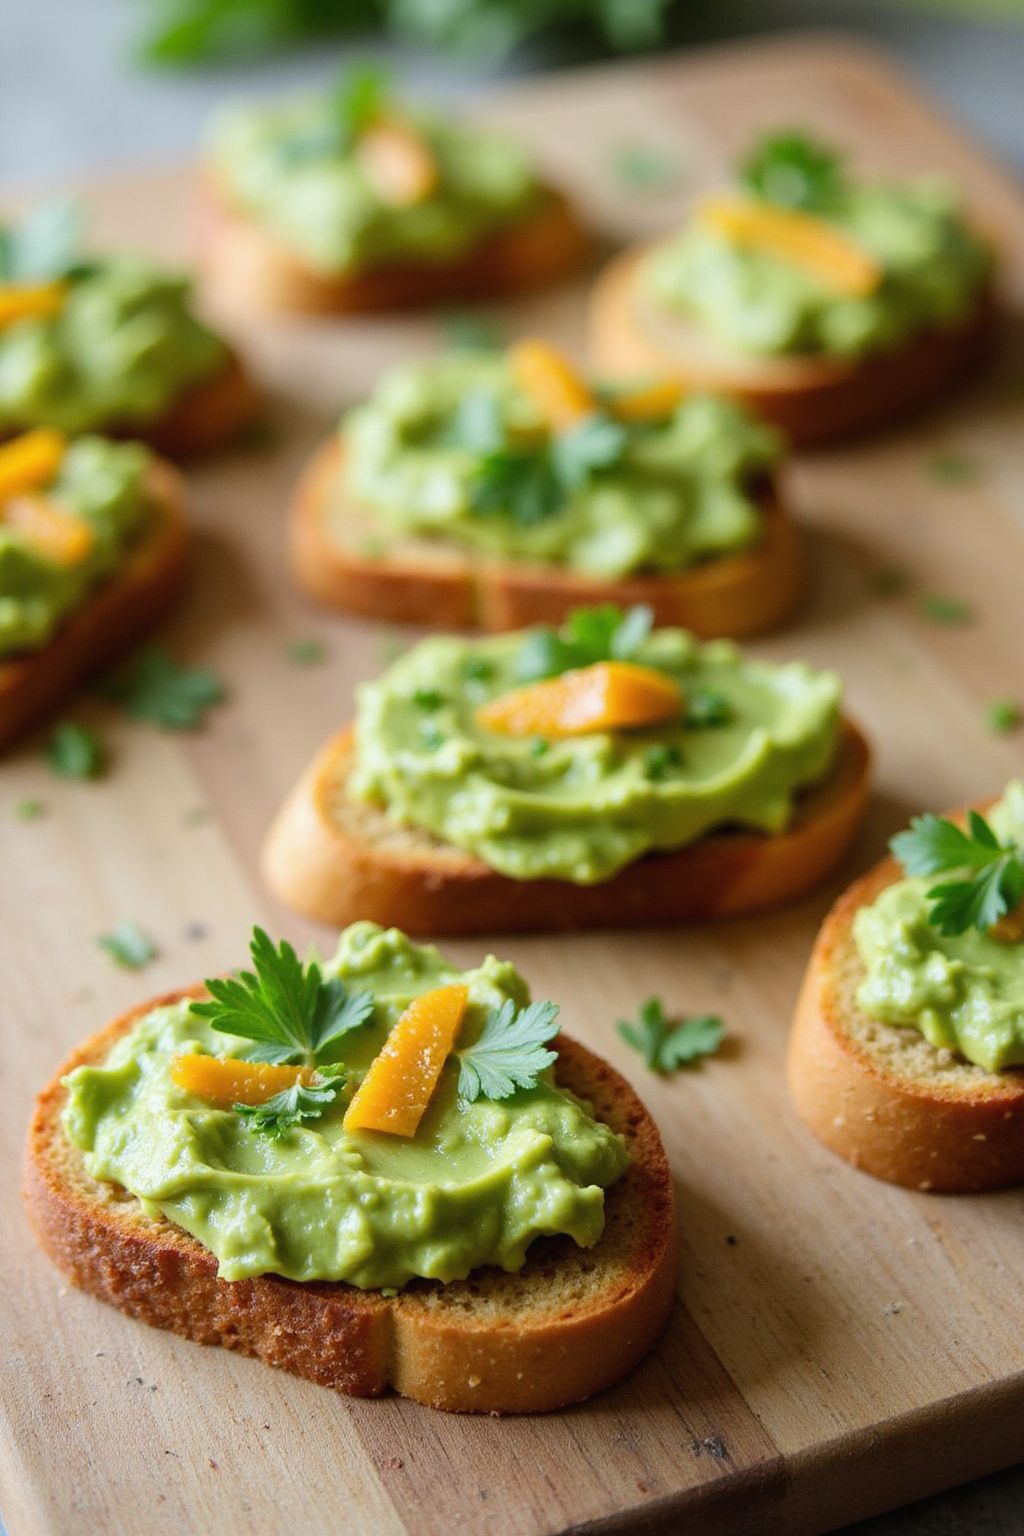
Citrus-Infused Avocado Toast Bites are a fresh and vibrant take on the classic snack. Bursting with zesty flavors, these delightful bites are perfect for spring gatherings. Plus, they’re easy to prepare and a hit with everyone!
Prep Time: 10 minutes
Total Time: 10 minutes
Servings: 4
Ingredients:
- 2 ripe avocados
- 1 tablespoon lime juice
- 1 tablespoon orange juice
- 1/2 teaspoon garlic powder
- Salt and pepper to taste
- 1 small baguette or gluten-free bread, sliced into bite-sized pieces
- Zest of 1 orange and 1 lime
- Fresh cilantro or parsley, for garnish
Instructions:
Start by cutting the avocados in half and removing the pits. Scoop the green flesh into a bowl. Add lime juice, orange juice, garlic powder, and sprinkle with salt and pepper. Mash everything together with a fork until it’s creamy and well mixed.
Next, toast the sliced bread lightly in a toaster or on a grill. You want them warm and slightly crispy. This will give them a nice texture that complements the creamy avocado spread.
Once the bread is toasted, spread a generous layer of the mashed avocado mixture on each piece. Use the back of a spoon to create a nice even layer.
Now, sprinkle the zest of the orange and lime over each toast bite. This adds a burst of flavor that brightens up every bite. Finally, sprinkle some fresh cilantro or parsley on top for a touch of color and flavor.
Serve these delightful bites immediately for the best taste. Enjoy the fresh citrus flavors with every crunch!
Tips:
- For an extra kick, add some red pepper flakes to the avocado mix.
- Try using different types of bread, like sourdough or whole grain, for variety.
- If you want a creamier texture, add a splash of olive oil to the avocado mixture.
Nutrition Facts:
- Calories: 150 per serving
- Protein: 4g
- Fat: 10g
- Carbohydrates: 15g
- Fiber: 5g
- Sugar: 1g
2 Chilled Cucumber Soup Shooters
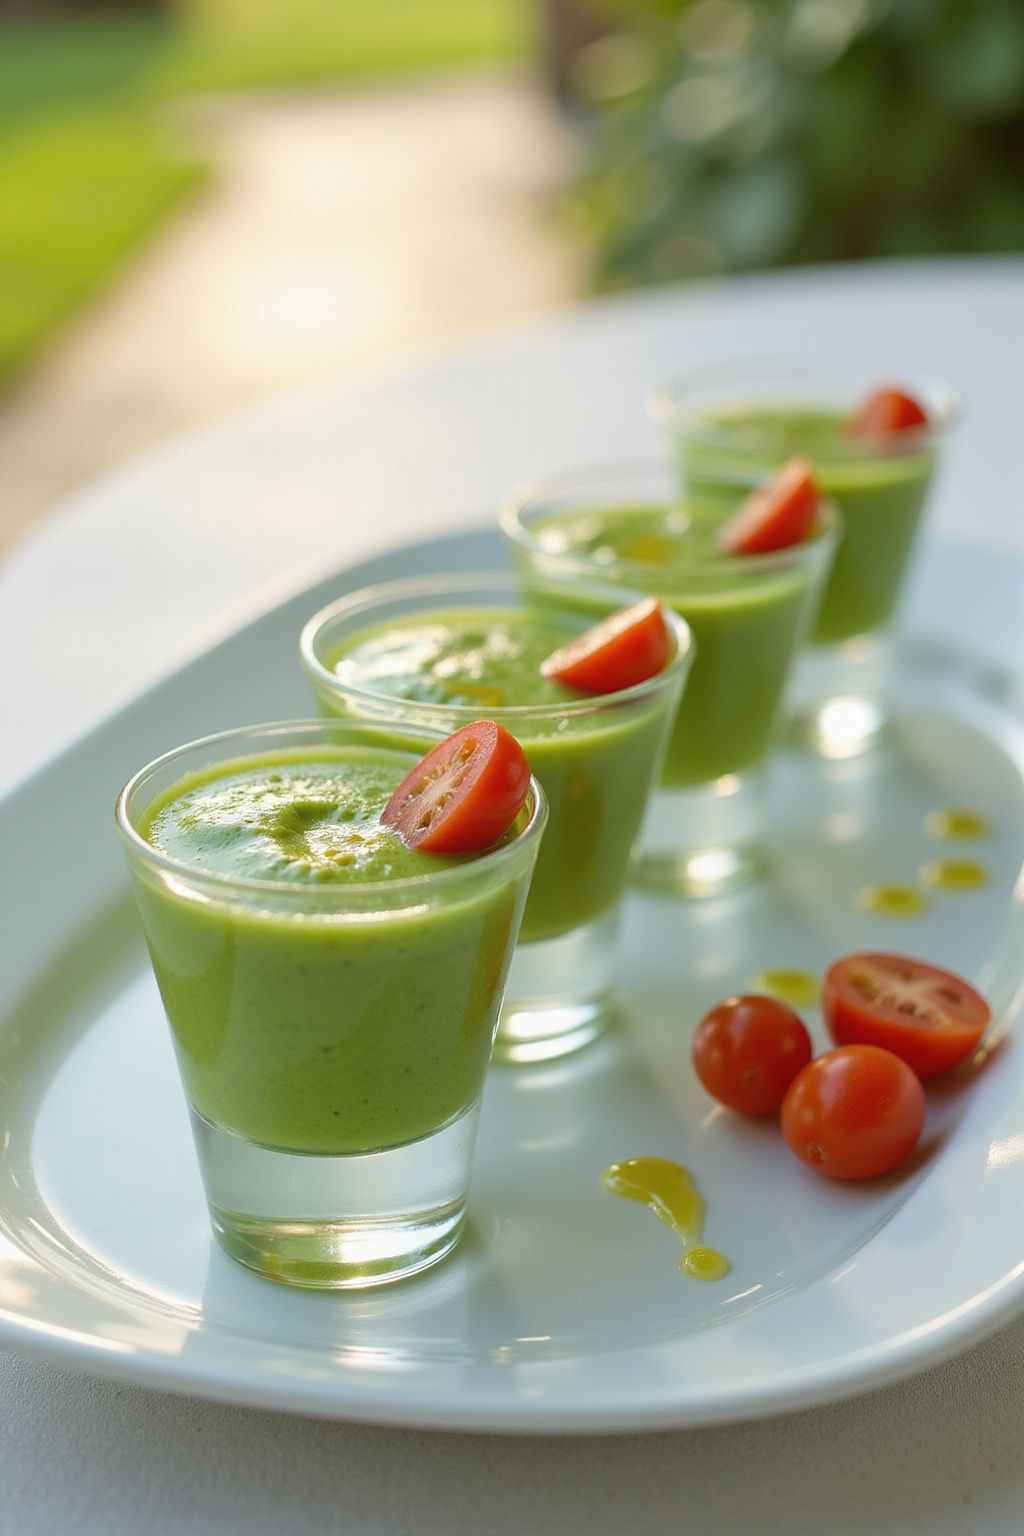
Chilled Cucumber Soup Shooters are a refreshing and tasty way to start any meal. They’re light, cool, and perfect for warm weather gatherings. Best of all, they’re super easy to make!
Prep Time: 15 minutes
Total Time: 15 minutes
Servings: 6
Ingredients:
- 2 large cucumbers, peeled and chopped
- 1 cup plain yogurt (Greek or regular)
- 1/4 cup fresh dill, chopped
- 1 tablespoon lemon juice
- 1 clove garlic, minced
- Salt and pepper, to taste
- 1 tablespoon olive oil (for drizzling, optional)
- Cherry tomatoes (for garnish, optional)
Instructions:
Start by chopping the cucumbers into smaller pieces. This will help them blend more easily. Then place the chopped cucumbers into a blender.
Add the plain yogurt, fresh dill, lemon juice, and minced garlic to the blender. Blend everything until it’s smooth and creamy. If you want your soup to be a little thinner, you can add a splash of water or more yogurt.
Once the mixture is blended, taste it and add salt and pepper as needed. Blend again for a few seconds to mix in the seasoning.
Pour the soup into small cups or shot glasses for serving. If you want, drizzle a bit of olive oil on top for added flavor.
Finally, if you like, cut cherry tomatoes in halves and place one on top of each shooter for a pretty presentation. Enjoy your chilled cucumber soup shooters!
Tips:
- For a smoother texture, strain the soup through a fine sieve before serving.
- You can prepare the soup in advance and chill it in the fridge for at least 30 minutes before serving.
- Feel free to experiment with other herbs like basil or mint for a different flavor!
Nutrition Facts:
- Calories: 100 per serving
- Fat: 6g
- Carbohydrates: 10g
- Protein: 4g
- Fiber: 1g
- Sugars: 2g
3 Asparagus and Lemon Zest Tartlets
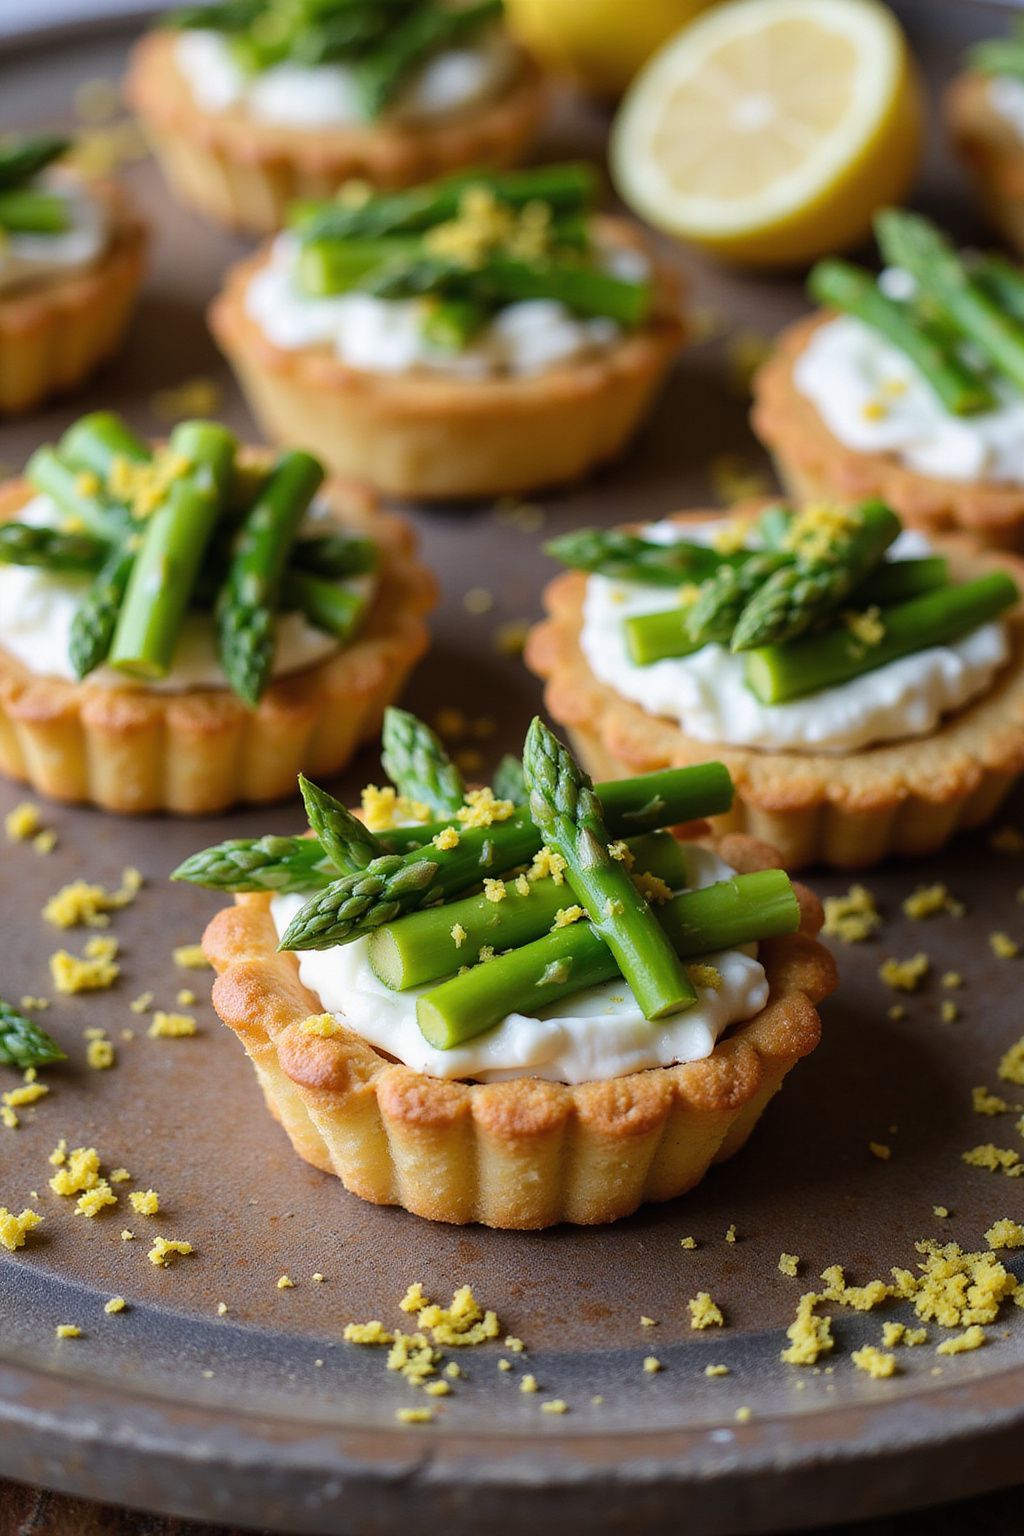
Asparagus and Lemon Zest Tartlets are a bright and delicious way to celebrate spring! These little treats are perfect for a gathering or a simple snack. With fresh asparagus and a zesty lemon flavor, they are sure to impress your guests.
Prep Time: 15 minutes
Cook Time: 20 minutes
Total Time: 35 minutes
Servings: 12 tartlets
Ingredients:
- 1 sheet of puff pastry, thawed
- 1 bunch of asparagus, trimmed and cut into small pieces
- 1 cup of ricotta cheese
- 1 lemon, zested and juiced
- 1 tablespoon of olive oil
- Salt and pepper to taste
- 1 egg, beaten (for egg wash)
Instructions:
Preheat your oven to 400°F (200°C). Roll out the puff pastry on a lightly floured surface. Cut it into 12 squares and place them in a muffin tin.
In a mixing bowl, combine the ricotta cheese, lemon zest, and lemon juice. Add a pinch of salt and pepper to taste, then stir until everything is mixed well.
Heat the olive oil in a pan over medium heat. Add the asparagus pieces and sauté for about 2-3 minutes until they are bright green and slightly tender. Remove from heat and allow to cool.
Spoon the ricotta mixture into each pastry shell, filling them about halfway. Top each one with a few pieces of sautéed asparagus. Brush the edges of the pastry with the beaten egg for a nice golden finish.
Bake in the preheated oven for 15-20 minutes or until the tartlets are golden brown. Let them cool for a few minutes before serving.
Tips:
- You can substitute asparagus with other veggies like spinach or zucchini for a different flavor.
- If you don’t have puff pastry, you can use phyllo dough as an alternative.
- Serve these tartlets warm for the best taste and texture!
Nutrition Facts:
- Calories: 150
- Protein: 5g
- Carbohydrates: 14g
- Fat: 8g
- Fiber: 1g
- Sugar: 1g
4 Radish and Herb Cream Cheese Roulades
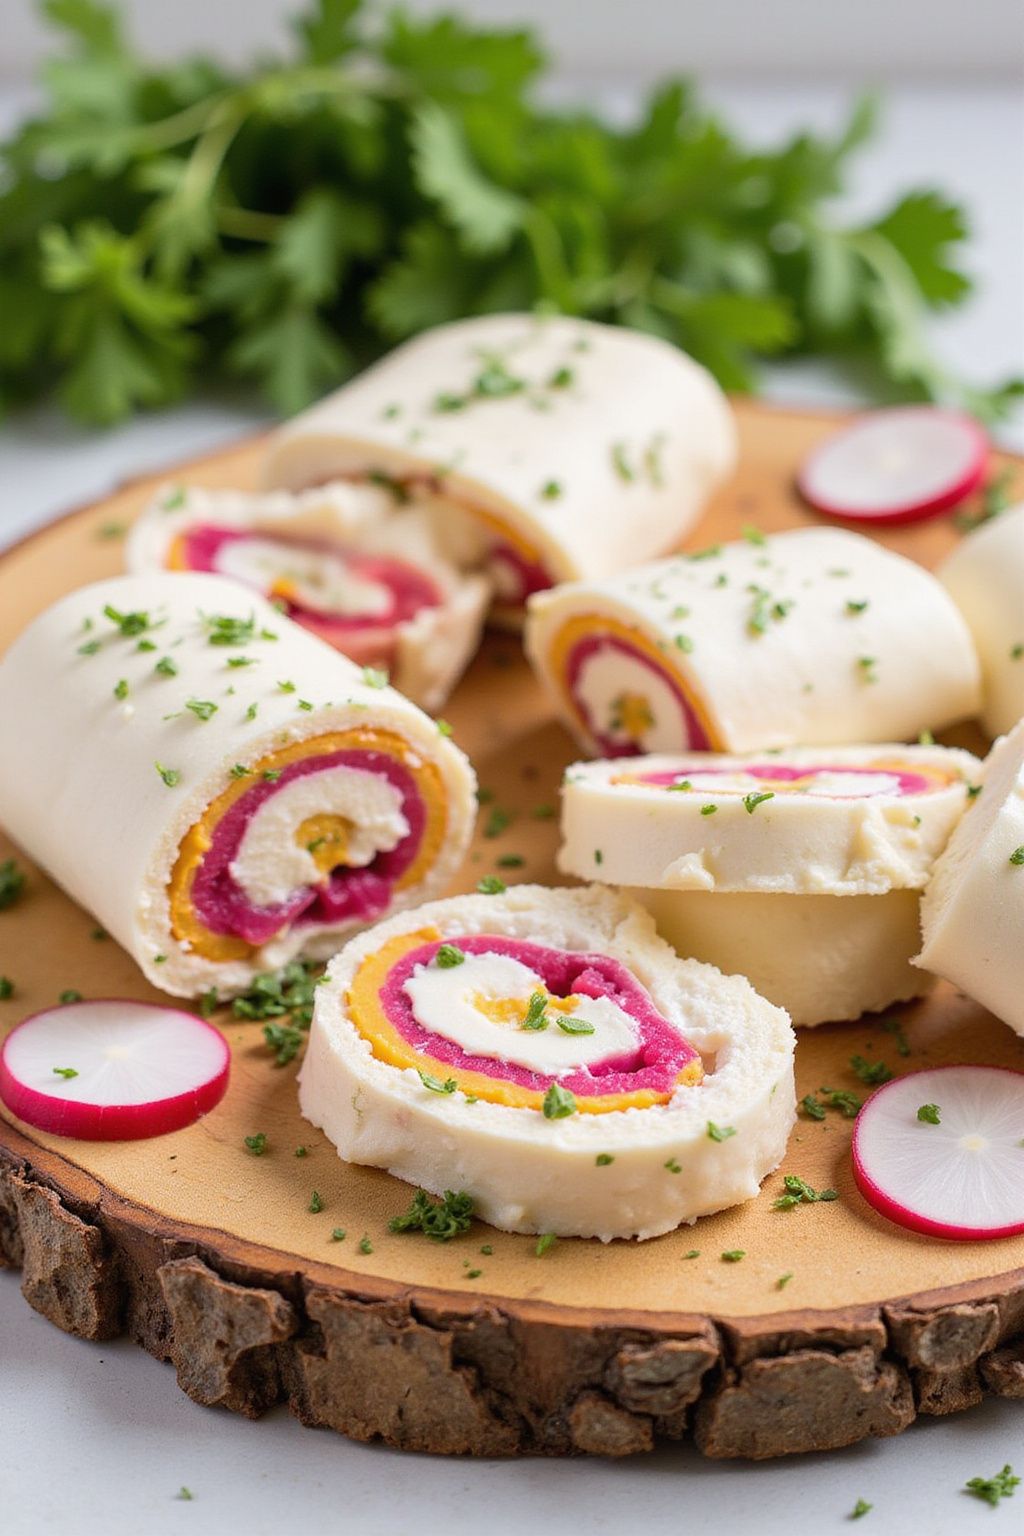
These Radish and Herb Cream Cheese Roulades are a fresh and delicious appetizer perfect for spring gatherings. Packed with flavor and color, they are easy to prepare and fun to eat.
Prep Time: 15 minutes
Additional Time: 30 minutes
Total Time: 45 minutes
Servings: 4
Ingredients:
- 6 large radishes, thinly sliced
- 8 oz cream cheese, softened
- 1 tbsp fresh dill, chopped
- 1 tbsp fresh chives, chopped
- 1 tbsp fresh parsley, chopped
- 1 tsp lemon juice
- Salt and pepper, to taste
- 4 whole wheat tortillas or flatbreads
Instructions:
Start by preparing the herb cream cheese mixture. In a bowl, combine the softened cream cheese, dill, chives, parsley, and lemon juice. Mix everything well until it’s smooth. Don’t forget to add a pinch of salt and pepper for flavor.
Next, take your tortillas or flatbreads and spread a generous layer of the herb cream cheese mixture on each one. Make sure to cover them evenly so each bite is delicious.
Now, carefully layer the thinly sliced radishes over the cream cheese spread. You can arrange them in a single layer, overlapping slightly for a beautiful look.
Once you’re done layering, it’s time to roll them up. Start at one end and gently roll the tortillas or flatbreads tightly. Make sure to keep the radishes and cream cheese inside as you roll.
After rolling, wrap the roulades in plastic wrap and place them in the refrigerator for about 30 minutes. This will help them keep their shape and make them easier to slice.
Finally, take the roulades out of the refrigerator and slice them into bite-sized pieces. You can serve them as they are or arrange them on a platter for a colorful presentation.
Tips:
- For extra flavor, try adding a splash of hot sauce to the cream cheese mixture.
- You can substitute the radishes with other vegetables like cucumbers or carrots if you prefer.
- Make sure to let the cream cheese come to room temperature before using. It makes mixing easier!
Nutrition Facts:
- Calories: 200
- Fat: 10g
- Carbohydrates: 25g
- Protein: 6g
- Fiber: 4g
- Sodium: 300mg
5 Mini Caprese Skewers with Balsamic Drizzle
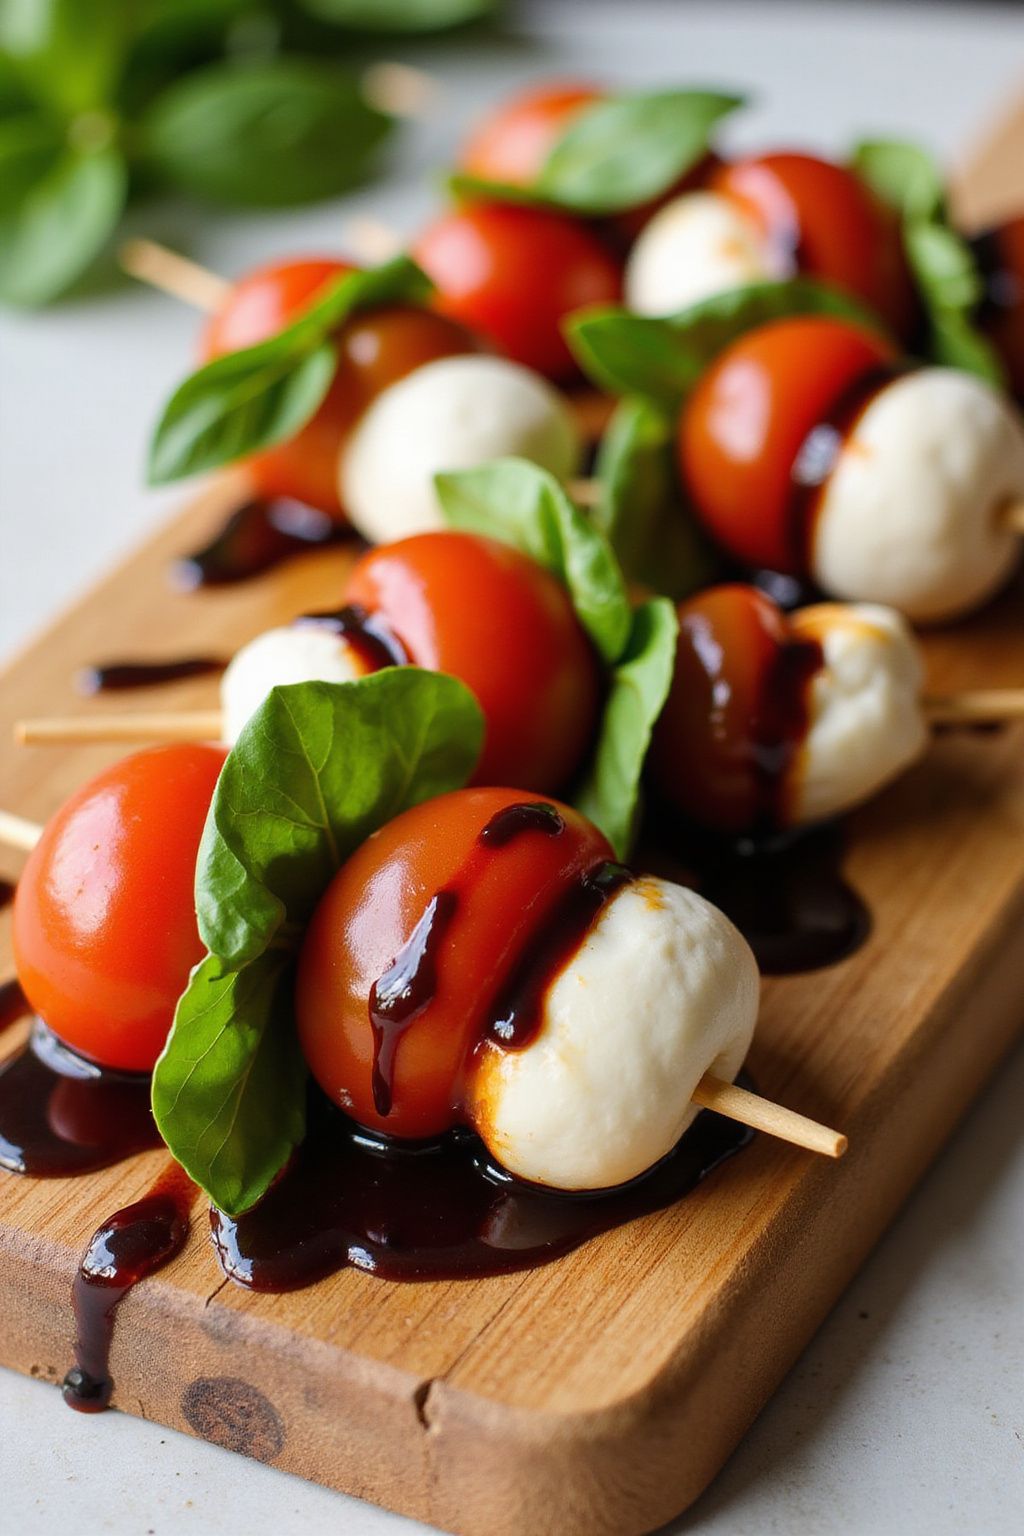
Mini Caprese Skewers with Balsamic Drizzle are a fun and delicious way to enjoy fresh flavors. Perfect for any gathering, these bite-sized treats combine juicy tomatoes, creamy mozzarella, and fragrant basil. The sweet tang of balsamic reduction ties it all together for a refreshing appetizer.
Prep Time: 15 minutes
Total Time: 15 minutes
Servings: 12 skewers
Ingredients:
- 12 grape tomatoes
- 12 mozzarella balls (bocconcini)
- 12 fresh basil leaves
- 1/4 cup balsamic vinegar
- Salt and pepper, to taste
- 12 toothpicks or small skewers
Instructions:
Start by making the balsamic drizzle. In a small saucepan, heat the balsamic vinegar over medium heat. Let it simmer until it reduces by half and becomes thick, about 8-10 minutes. Stir occasionally and watch closely to prevent burning. Once thickened, take it off the heat and let it cool.
While the balsamic is reducing, wash the grape tomatoes and basil leaves under cold water. Pat them dry with a towel.
Now, assemble the skewers. Take a toothpick or skewer and slide on a grape tomato, followed by a mozzarella ball, and then a basil leaf. Repeat this process until all ingredients are used up.
Before serving, drizzle the cooled balsamic reduction over the skewers. Finally, sprinkle with a little salt and pepper to enhance the flavors.
Tips:
- Use fresh basil leaves for the best taste and aroma.
- You can prepare the balsamic drizzle a day ahead and store it in the refrigerator.
- For added flavor, marinate the mozzarella balls in olive oil, garlic, and herbs for a few hours before assembling the skewers.
Nutrition Facts:
- Calories: 120
- Protein: 7g
- Carbohydrates: 11g
- Fat: 7g
- Fiber: 1g
- Sugar: 3g
6 Spring Pea Hummus with Veggie Chips
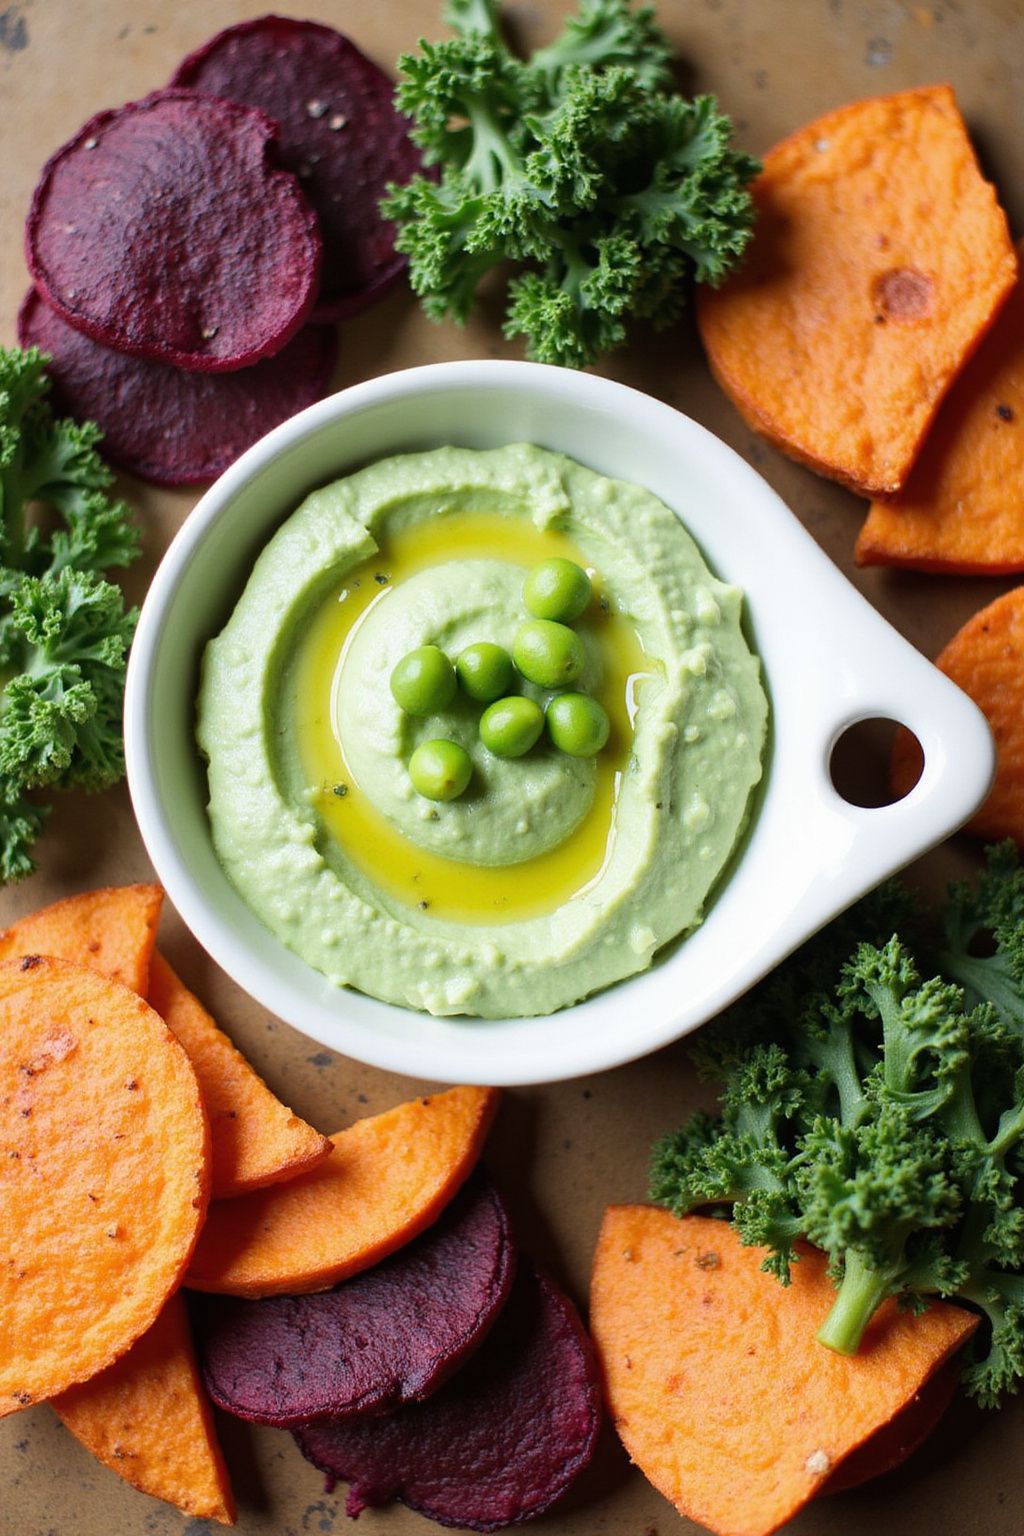
Spring Pea Hummus with Veggie Chips is a fresh and colorful snack perfect for any spring gathering. This bright, creamy dip pairs wonderfully with crunchy veggie chips. Plus, it’s easy to whip up in just a few minutes!
Prep Time: 10 minutes
Total Time: 10 minutes
Servings: 4
Ingredients:
- 1 cup fresh or frozen peas (thawed if frozen)
- 1/4 cup tahini
- 2 tablespoons olive oil
- 1 tablespoon lemon juice
- 1 clove garlic, minced
- Salt and pepper to taste
- Veggie chips for serving (store-bought or homemade)
Instructions:
Start by adding the peas, tahini, olive oil, lemon juice, and minced garlic into a food processor. Pulse the ingredients together until they blend smoothly.
You can add a little bit of water if the mixture is too thick. If you do, blend again until you reach your desired consistency.
Once the mixture is creamy, taste it and add salt and pepper to your liking. Blend again to mix in the seasoning.
Transfer the hummus into a serving bowl and garnish with a drizzle of olive oil or some extra peas on top if you like. Serve with your favorite veggie chips and enjoy!
Tips:
- For added flavor, consider mixing in herbs like mint or basil into the hummus.
- You can jazz up the veggie chips by sprinkling them with sea salt or your favorite seasoning before serving.
- This hummus can be stored in the fridge for up to 3 days in an airtight container.
Nutrition Facts:
- Calories: 180 per serving
- Fat: 10g
- Carbohydrates: 16g
- Protein: 6g
- Fiber: 5g
7 Zucchini and Feta Fritters

Zucchini and Feta Fritters are a delicious way to enjoy fresh veggies. They are crispy on the outside and tender on the inside, with a burst of flavor from feta cheese. Perfect as an appetizer or a light snack, these fritters are quick and easy to make.
Prep Time: 15 minutes
Cook Time: 10 minutes
Total Time: 25 minutes
Servings: 4
Ingredients:
- 2 medium zucchinis, grated
- 1 cup feta cheese, crumbled
- 1/2 cup all-purpose flour
- 2 large eggs
- 1/4 cup green onions, chopped
- 1/4 teaspoon garlic powder
- Salt and pepper, to taste
- Olive oil, for frying
Instructions:
Start by grating the zucchinis. Place them in a clean kitchen towel and squeeze out the excess moisture. This step is important to avoid soggy fritters.
In a large bowl, combine the grated zucchini, crumbled feta cheese, all-purpose flour, eggs, chopped green onions, garlic powder, salt, and pepper. Mix everything together until well combined. The mixture should be thick but still hold together.
Heat a skillet over medium heat and add a drizzle of olive oil. Once hot, scoop out about 2 tablespoons of the fritter mixture and carefully place it in the skillet. Flatten it slightly with a spatula.
Cook the fritters for about 3-4 minutes on each side, or until they are golden brown and crispy. Make sure not to overcrowd the pan; cook in batches if necessary.
Once done, transfer the fritters to a plate lined with paper towels to soak up any excess oil. Serve warm and enjoy!
Tips:
- Feel free to add herbs like dill or parsley for extra flavor.
- To make the fritters healthier, bake them in the oven at 375°F for around 20 minutes instead of frying.
- Serve with tzatziki sauce or your favorite dipping sauce for a tasty addition.
Nutrition Facts:
- Calories: 180 per serving
- Protein: 8g
- Fat: 12g
- Carbohydrates: 10g
- Fiber: 1g
- Sodium: 350mg
8 Mango Salsa with Crispy Plantain Chips
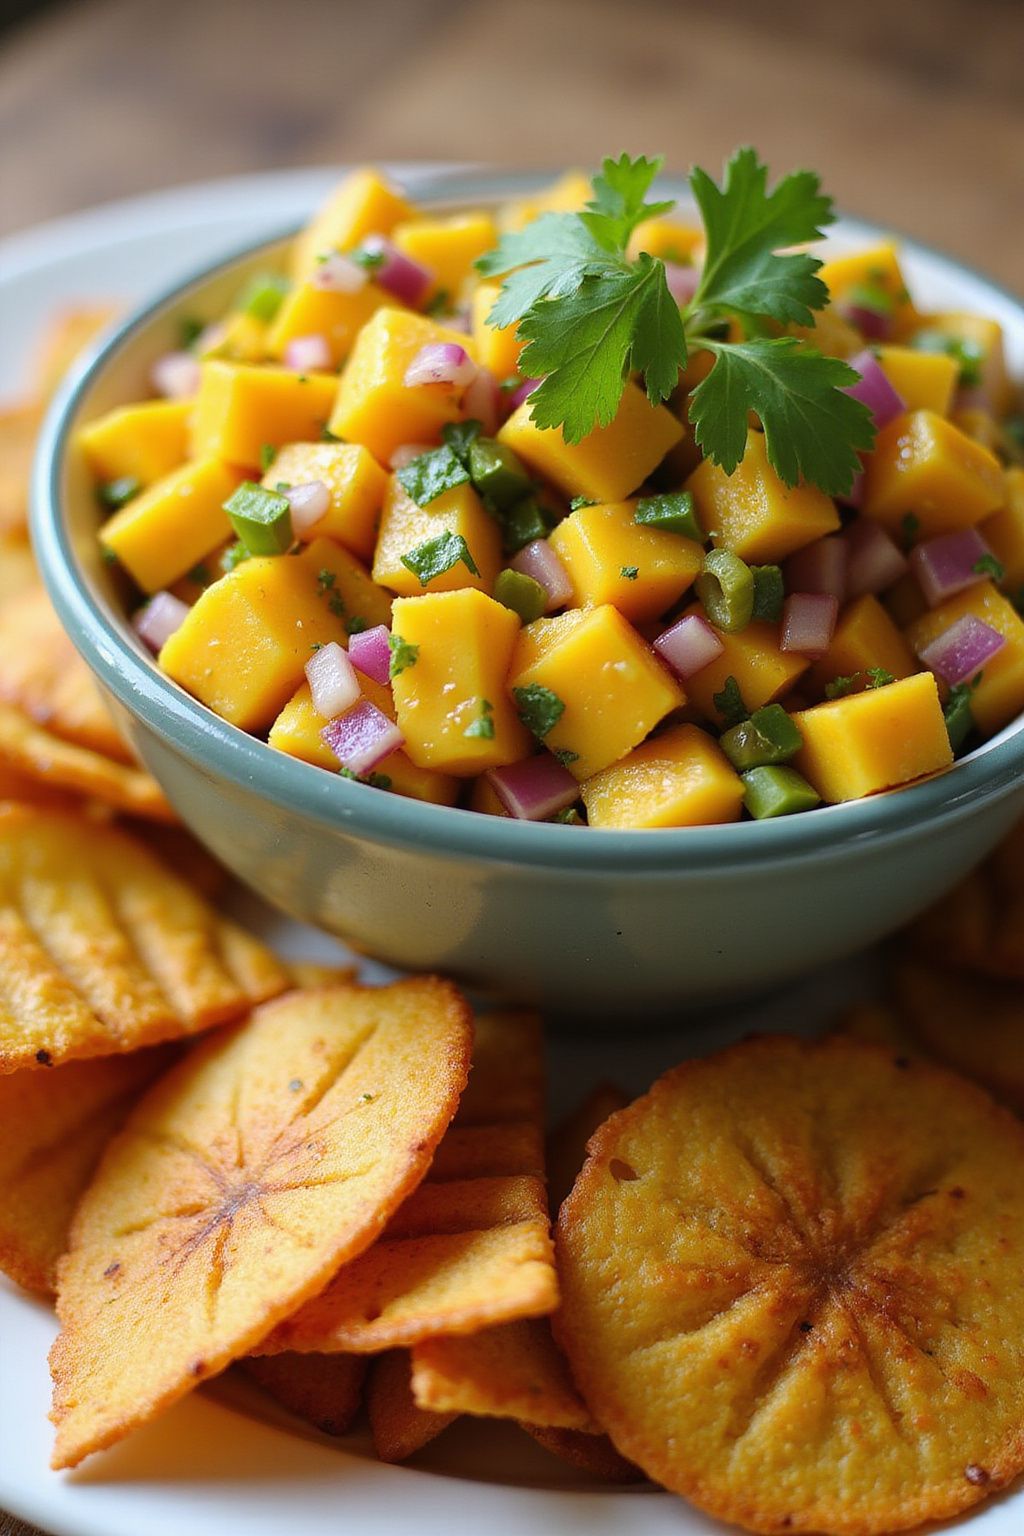
Bright and fresh, Mango Salsa with Crispy Plantain Chips makes for a perfect spring appetizer! This combination is not just delicious but also easy to prepare. You’ll love the sweet mango paired with crunchy chips that are perfect for dipping.
Prep Time: 15 minutes
Total Time: 15 minutes
Servings: 4
Ingredients:
- 2 ripe mangoes, diced
- 1 small red onion, finely chopped
- 1 jalapeño, deseeded and minced
- 1/4 cup fresh cilantro, chopped
- Juice of 1 lime
- Salt, to taste
- 2 green plantains
- Vegetable oil, for frying
Instructions:
Start by preparing the mango salsa. In a medium bowl, combine the diced mangoes, red onion, jalapeño, and cilantro. This mix adds vibrant colors and flavors.
Next, squeeze the lime juice over the mixture and add a pinch of salt. Give it a gentle stir to combine all the ingredients. Set the salsa aside to let the flavors meld together while you prepare the plantain chips.
For the crispy plantain chips, peel the plantains and slice them thinly at a diagonal angle. This shape will give them a nice presentation and crunch.
Heat the vegetable oil in a frying pan over medium heat. When the oil is hot, carefully add the plantain slices in batches. Fry them until they are golden brown and crispy, which usually takes about 3-4 minutes per side.
Once finished, remove the chips from the oil and let them drain on a paper towel. Repeat until all the plantain slices have been fried.
Finally, serve the mango salsa in a bowl with the crispy plantain chips on the side. Enjoy this delightful appetizer with friends and family!
Tips:
- Make sure to use ripe mangoes for the best sweetness.
- If you prefer a spicier salsa, leave some seeds in the jalapeño.
- Store leftover salsa in the fridge for up to 2 days in an airtight container.
Nutrition Facts:
- Calories: 150 per serving
- Protein: 2g
- Total Fat: 7g
- Saturated Fat: 1g
- Carbohydrates: 22g
- Dietary Fiber: 3g
- Sugars: 10g
9 Lemon-Basil Shrimp Cocktail
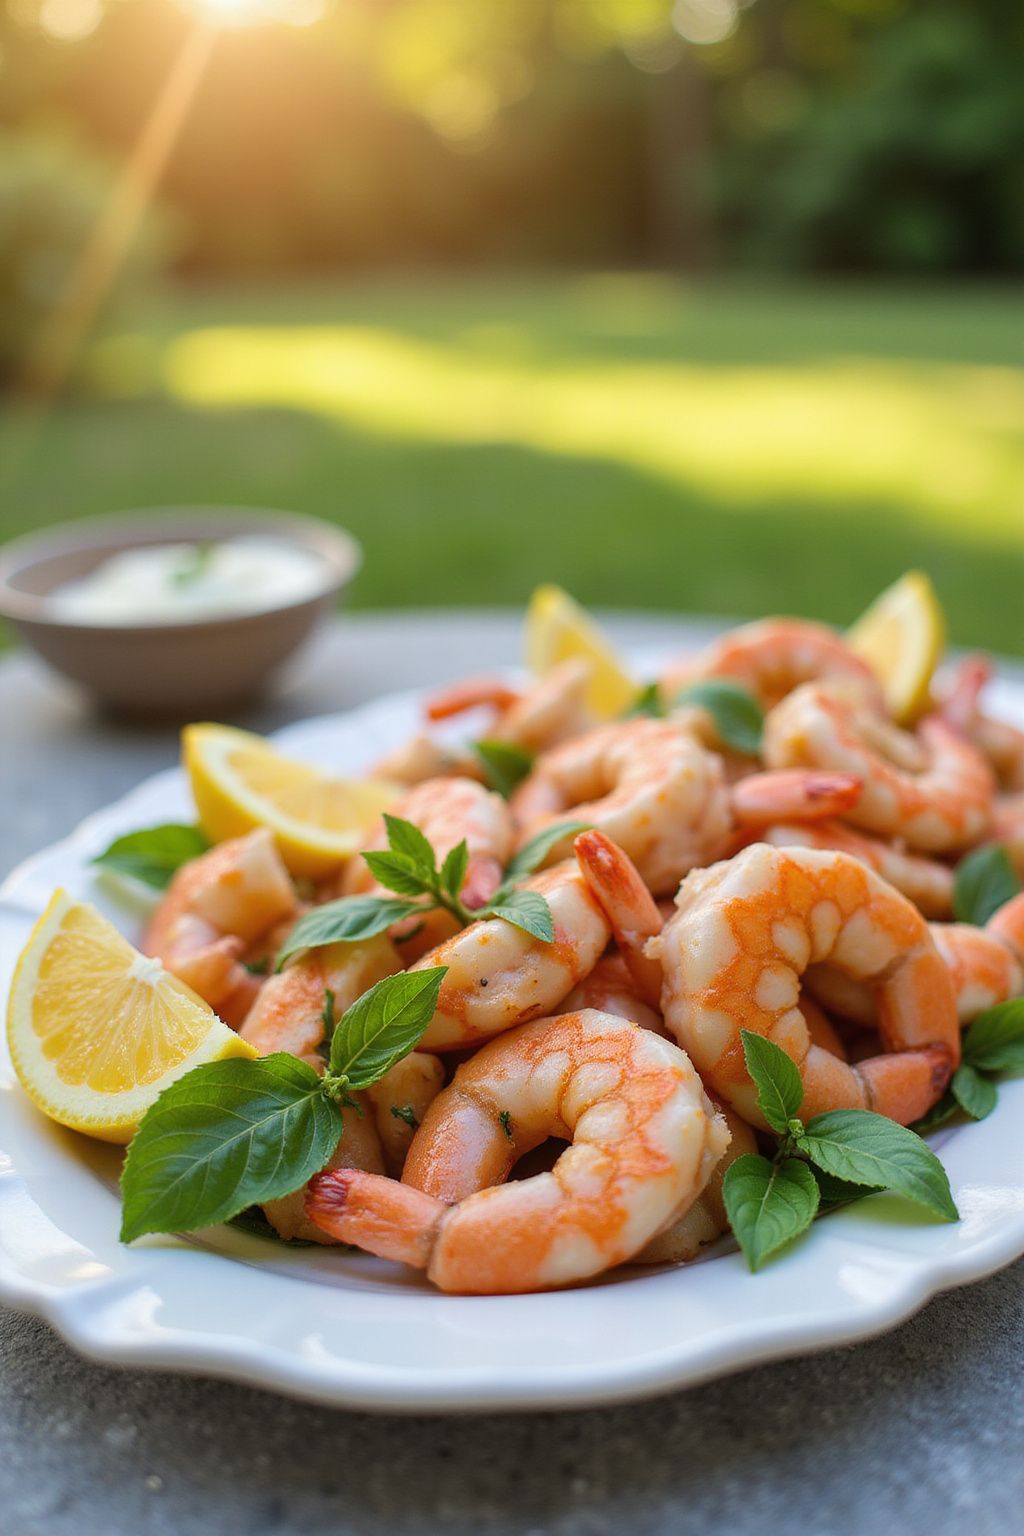
Lemon-Basil Shrimp Cocktail is a refreshing appetizer that’s perfect for spring gatherings. The bright flavors of lemon and fresh basil make this dish a delightful start to any meal. Plus, it’s super easy to prepare!
Prep Time: 15 minutes
Total Time: 15 minutes
Servings: 4
Ingredients:
- 1 pound large shrimp, peeled and deveined
- 1/4 cup freshly squeezed lemon juice
- 2 tablespoons olive oil
- 1/4 cup fresh basil leaves, chopped
- 1 teaspoon garlic, minced
- 1 teaspoon salt
- 1/2 teaspoon black pepper
- Lemon wedges, for serving
- Fresh basil leaves, for garnish
Instructions:
Start by bringing a pot of water to a boil. Once it’s boiling, add the shrimp and let them cook for about 2-3 minutes, or until they turn pink and opaque. Make sure not to overcook them, as they can become tough.
After the shrimp are cooked, drain them and rinse them under cold water to cool them down quickly. You want the shrimp to be firm and chilled.
In a large mixing bowl, combine the lemon juice, olive oil, chopped basil, minced garlic, salt, and black pepper. Stir everything together to create a flavorful dressing.
Add the chilled shrimp to the bowl with the dressing. Toss them gently until the shrimp are well coated in the mixture. Let it sit for about 5 minutes to allow the flavors to blend.
To serve, place the shrimp on a platter. Garnish with fresh basil leaves and lemon wedges. Enjoy your shiny, zesty, and delicious Lemon-Basil Shrimp Cocktail!
Tips:
- For added flavor, let the shrimp marinate in the dressing for up to 30 minutes before serving.
- Use fresh basil for the best flavor; dried basil won’t be as vibrant.
- Serve the shrimp cocktail with toothpicks for easy eating!
Nutrition Facts:
- Calories: 220
- Protein: 25g
- Fat: 10g
- Carbohydrates: 3g
- Fiber: 0g
- Sugar: 0g
10 Roasted Beet and Goat Cheese Crostini
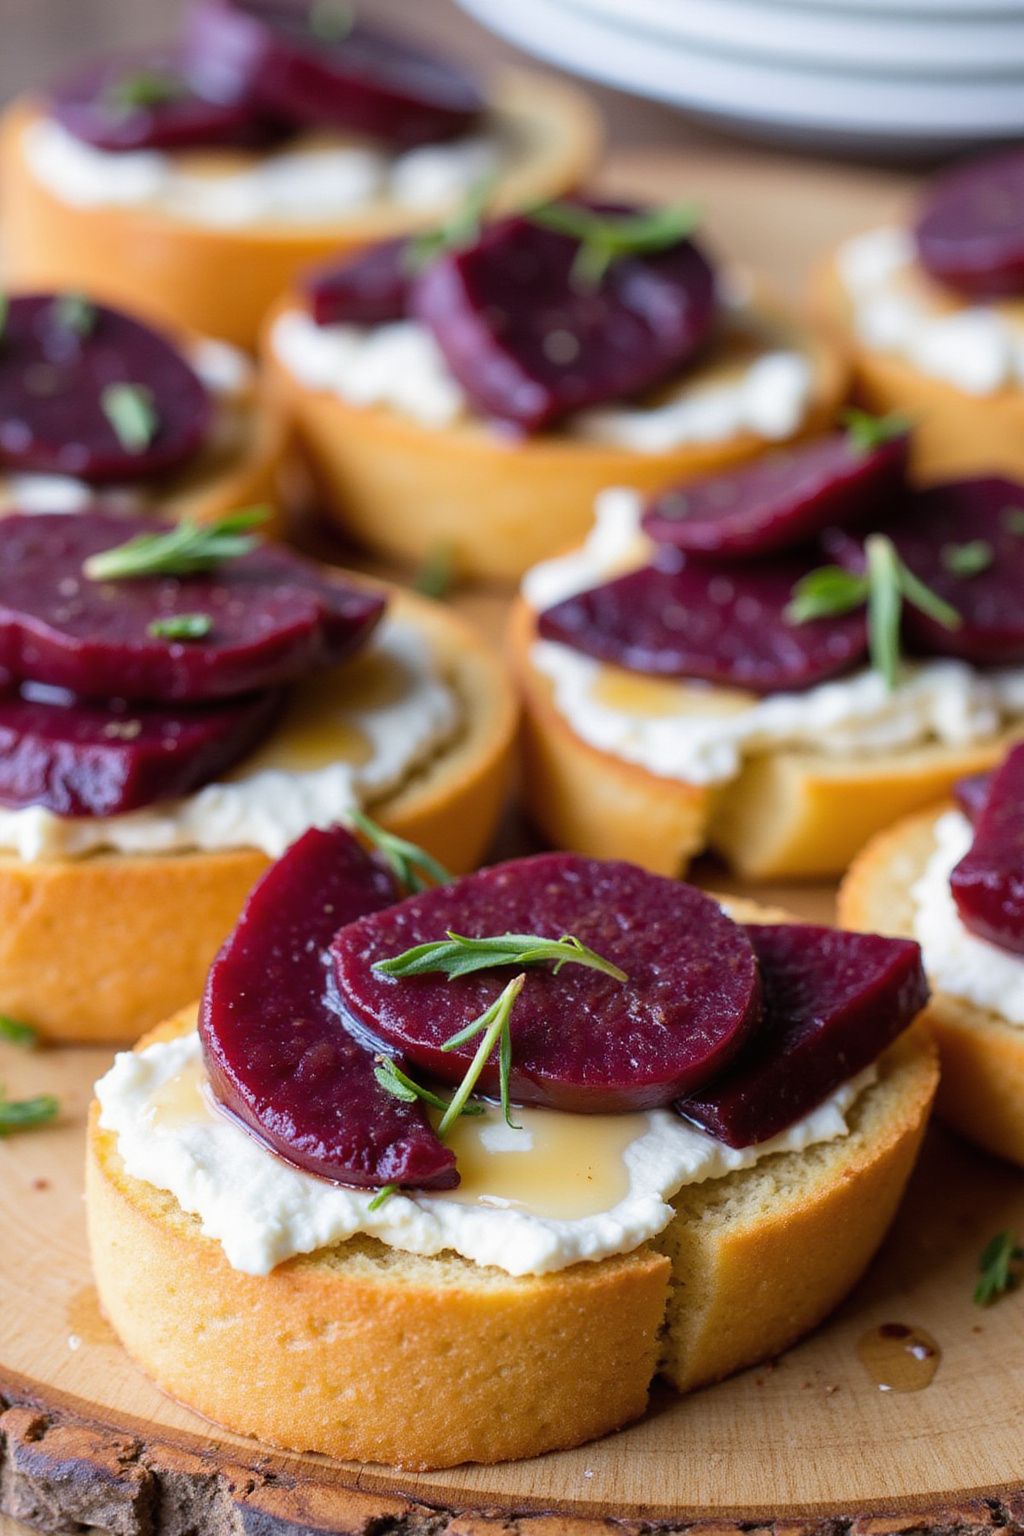
Roasted Beet and Goat Cheese Crostini is a bright and flavorful appetizer perfect for any gathering. The earthy sweetness of beets combined with creamy goat cheese on crispy bread makes for an unforgettable bite. Plus, it’s easy to prepare and looks impressive on any table!
Prep Time: 15 minutes
Additional Time: 30 minutes
Total Time: 45 minutes
Servings: 12 crostini
Ingredients:
- 2 medium-sized beets
- 1 tablespoon olive oil
- 1 teaspoon salt
- 1 teaspoon black pepper
- 12 slices of French baguette
- 4 ounces goat cheese
- 1 tablespoon honey
- Fresh **thyme leaves for garnish (optional)
Instructions:
Start by preheating your oven to 400°F (200°C). While it heats up, wash the beets thoroughly. Wrap each beet in aluminum foil with a drizzle of olive oil, salt, and black pepper. Seal the foil tightly.
Place the wrapped beets directly onto the oven rack and roast for about 30-35 minutes until they are tender when pierced with a fork. Once done, let them cool for a few minutes before unwrapping. When cool enough to handle, peel the skins off and slice them into thin rounds.
Next, arrange the baguette slices on a baking sheet. Brush one side of each slice with a little more olive oil. Toast the bread in the preheated oven for about 5-7 minutes until it is golden brown and crispy.
Once the bread is toasted, spread a generous layer of goat cheese on each slice. Top with the roasted beet slices and drizzle with honey for a sweet touch. If you have fresh thyme, sprinkle a few leaves on top for added flavor and decoration.
Your Roasted Beet and Goat Cheese Crostini is ready to serve! Arrange them on a platter and enjoy.
Tips:
- You can prepare the roasted beets a day in advance to save time.
- For a fun twist, try adding a sprinkle of walnuts or pistachios on top for added crunch.
- If you prefer a different cheese, try feta or cream cheese instead of goat cheese.
Nutrition Facts:
- Calories: 150 per crostini
- Protein: 5g
- Carbohydrates: 20g
- Fat: 6g
- Fiber: 2g
- Sugar: 5g
11 Savory Quinoa Stuffed Mini Peppers
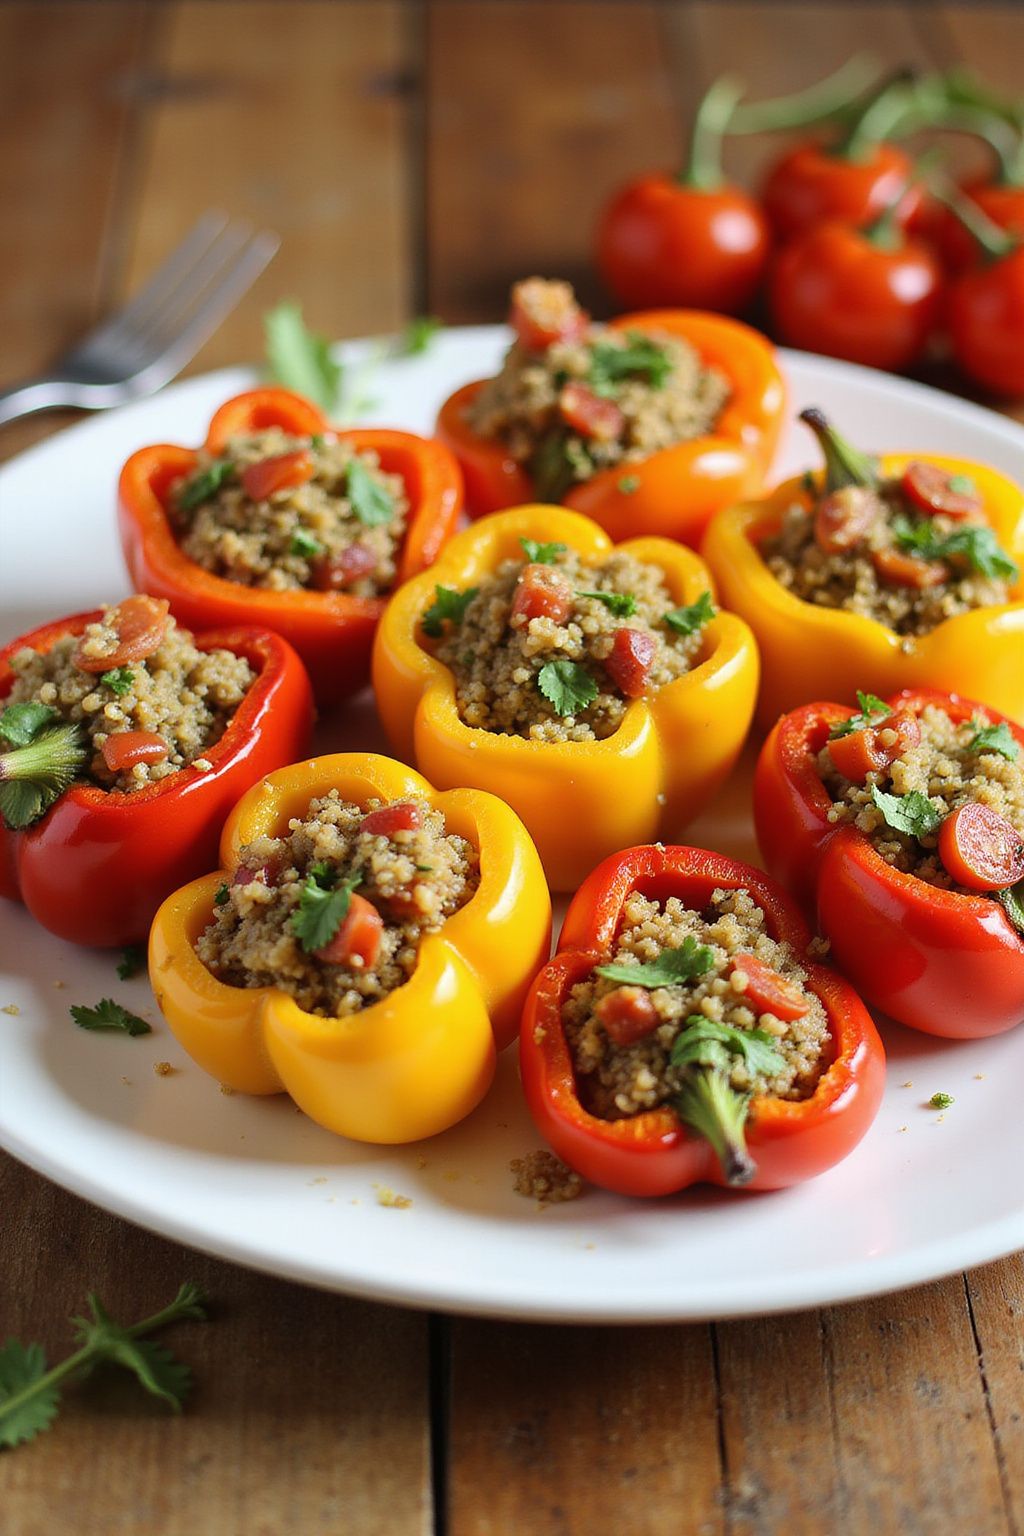
Savory Quinoa Stuffed Mini Peppers are a delightful and healthy treat that packs a punch of flavor in every bite. These colorful little peppers are not only cute but also filled with protein-rich quinoa and fresh vegetables. They are perfect for a light spring appetizer or a snack!
Prep Time: 15 minutes
Cook Time: 20 minutes
Additional Time: 10 minutes
Total Time: 45 minutes
Servings: 4
Ingredients:
- 12 mini sweet peppers, halved and seeded
- 1 cup cooked quinoa
- 1/2 cup cherry tomatoes, diced
- 1/4 cup red onion, finely chopped
- 1/2 cup black beans, rinsed and drained
- 1/2 teaspoon cumin
- 1/2 teaspoon paprika
- 1/4 teaspoon salt
- 1/4 teaspoon black pepper
- 1/4 cup fresh cilantro, chopped
- 1/2 cup shredded cheese (optional)
- Olive oil spray
Instructions:
Preheat your oven to 375°F (190°C). This ensures that the mini peppers will roast nicely. While the oven is heating, prepare your mini peppers by cutting them in half and removing the seeds.
In a large bowl, combine the cooked quinoa, diced cherry tomatoes, chopped red onion, black beans, cumin, paprika, salt, and black pepper. Mix everything together well until all the ingredients are evenly blended.
Next, gently fold in the chopped cilantro for a fresh flavor boost. If you’re a cheese lover, add in the shredded cheese at this point as well.
Now, with a spoon, carefully fill each half of the mini peppers with the quinoa mixture. Make sure to pack them in a bit so there’s plenty of filling in each pepper.
Place the stuffed mini peppers on a baking sheet, and lightly spray them with olive oil to help them roast. Bake in the oven for about 20 minutes, or until the peppers are tender and slightly charred.
After baking, let them cool for about 10 minutes before serving, and enjoy your delicious Savory Quinoa Stuffed Mini Peppers!
Tips:
- Experiment with different spices, such as chili powder or garlic powder, to customize the flavor to your liking.
- Add some diced avocado or corn to the filling for even more texture and taste.
- These stuffed peppers can be made ahead of time and stored in the fridge until you’re ready to bake them.
Nutrition Facts:
- Calories: 150 per serving
- Protein: 6g
- Fat: 5g
- Carbohydrates: 22g
- Fiber: 4g
- Sugar: 2g
12 Spinach and Feta Puff Pastry Bites
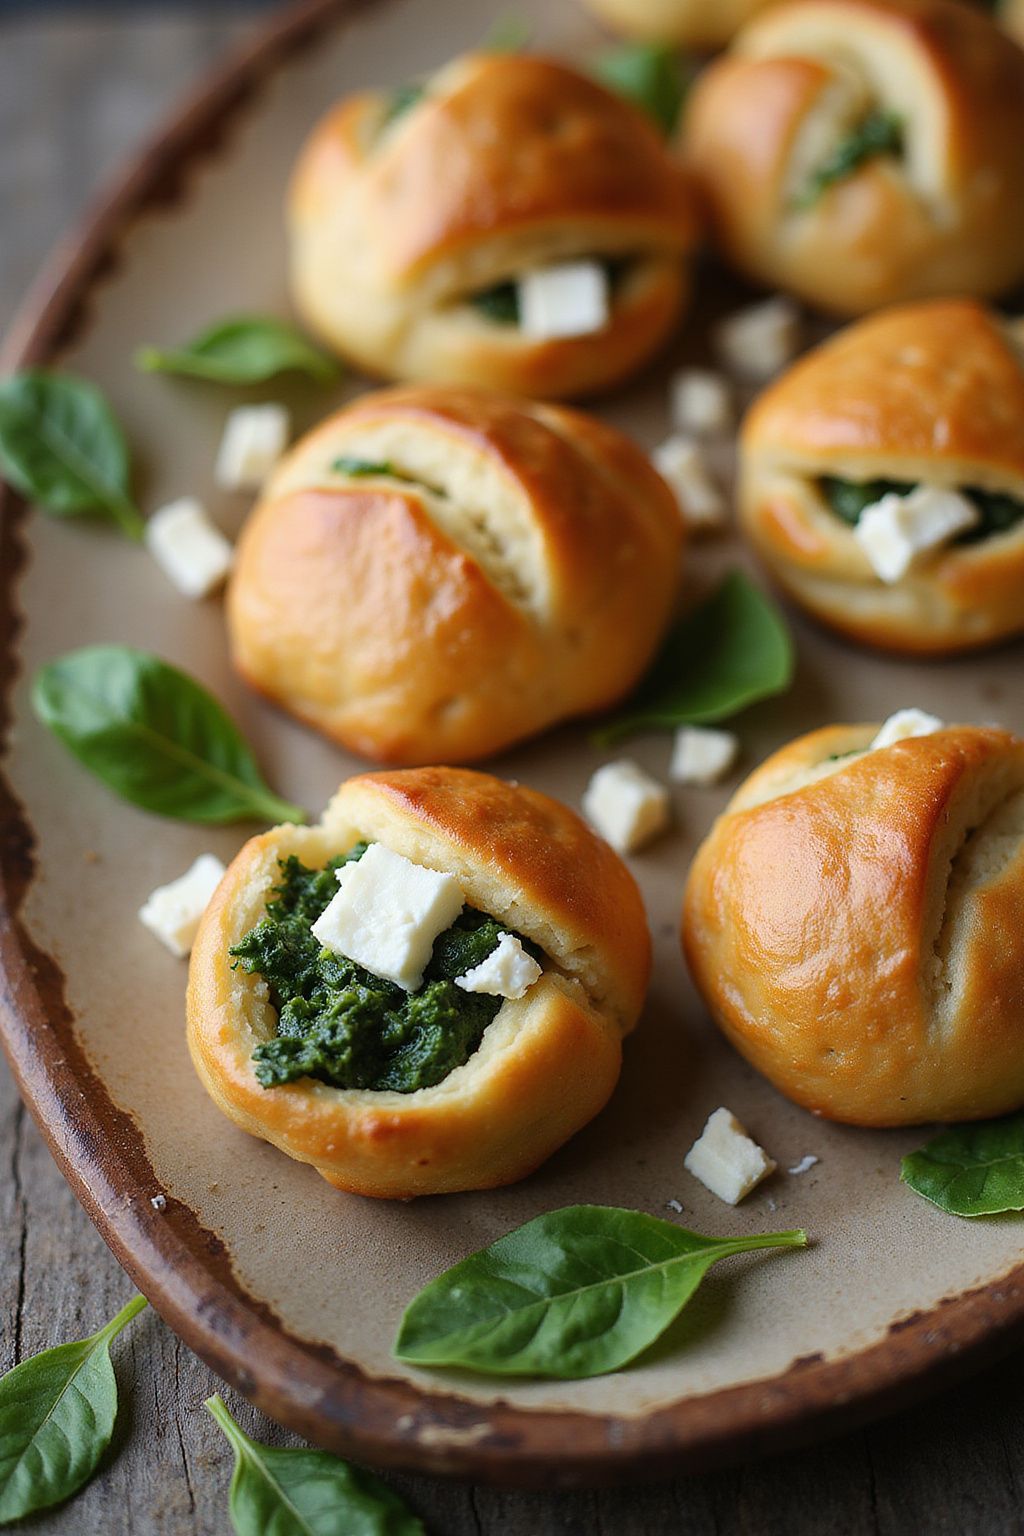
These Spinach and Feta Puff Pastry Bites are a delicious and easy appetizer perfect for any gathering. They are crispy, cheesy, and filled with healthy spinach. Your guests will love these little bites!
Prep Time: 15 minutes
Cook Time: 20 minutes
Total Time: 35 minutes
Servings: 12 bites
Ingredients:
- 1 sheet of puff pastry, thawed
- 1 cup fresh spinach, chopped
- 1/2 cup feta cheese, crumbled
- 1 egg, beaten (for egg wash)
- 1 clove garlic, minced
- 1/4 teaspoon salt
- 1/4 teaspoon black pepper
- 1 tablespoon olive oil
Instructions:
First, preheat your oven to 400°F (200°C). This will ensure your pastries are nice and golden brown when they bake.
Next, in a skillet, heat the olive oil over medium heat. Add the minced garlic and sauté it for about 30 seconds, just until fragrant. Then, add the chopped spinach and cook until it wilts, which should take around 2-3 minutes.
Once the spinach is cooked, remove the skillet from heat. In the same skillet, add the feta cheese, salt, and pepper to the spinach mixture. Stir everything together until well combined.
Now, roll out the puff pastry on a lightly floured surface. Cut it into 3-inch squares. Place a spoonful of the spinach and feta mixture in the center of each square.
Next, fold the corners of the puff pastry over the filling to create a little pocket. Press the seams to seal them shut.
For a nice golden finish, brush the tops of each pastry with the beaten egg using a pastry brush.
Finally, place the filled puff pastries on a baking sheet lined with parchment paper. Bake for 15-20 minutes, or until they are golden brown and puffed up.
Let the bites cool slightly before serving, and enjoy!
Tips:
- You can add some spices like oregano or paprika for extra flavor.
- Make sure the puff pastry is fully thawed to get the best results.
- For a vegetarian option, skip the garlic for a milder taste.
Nutrition Facts:
- Calories: 150
- Protein: 4g
- Total Fat: 9g
- Saturated Fat: 4g
- Carbohydrates: 13g
- Dietary Fiber: 1g
- Sugars: 0g
13 Crispy Chickpea and Avocado Salad Cups
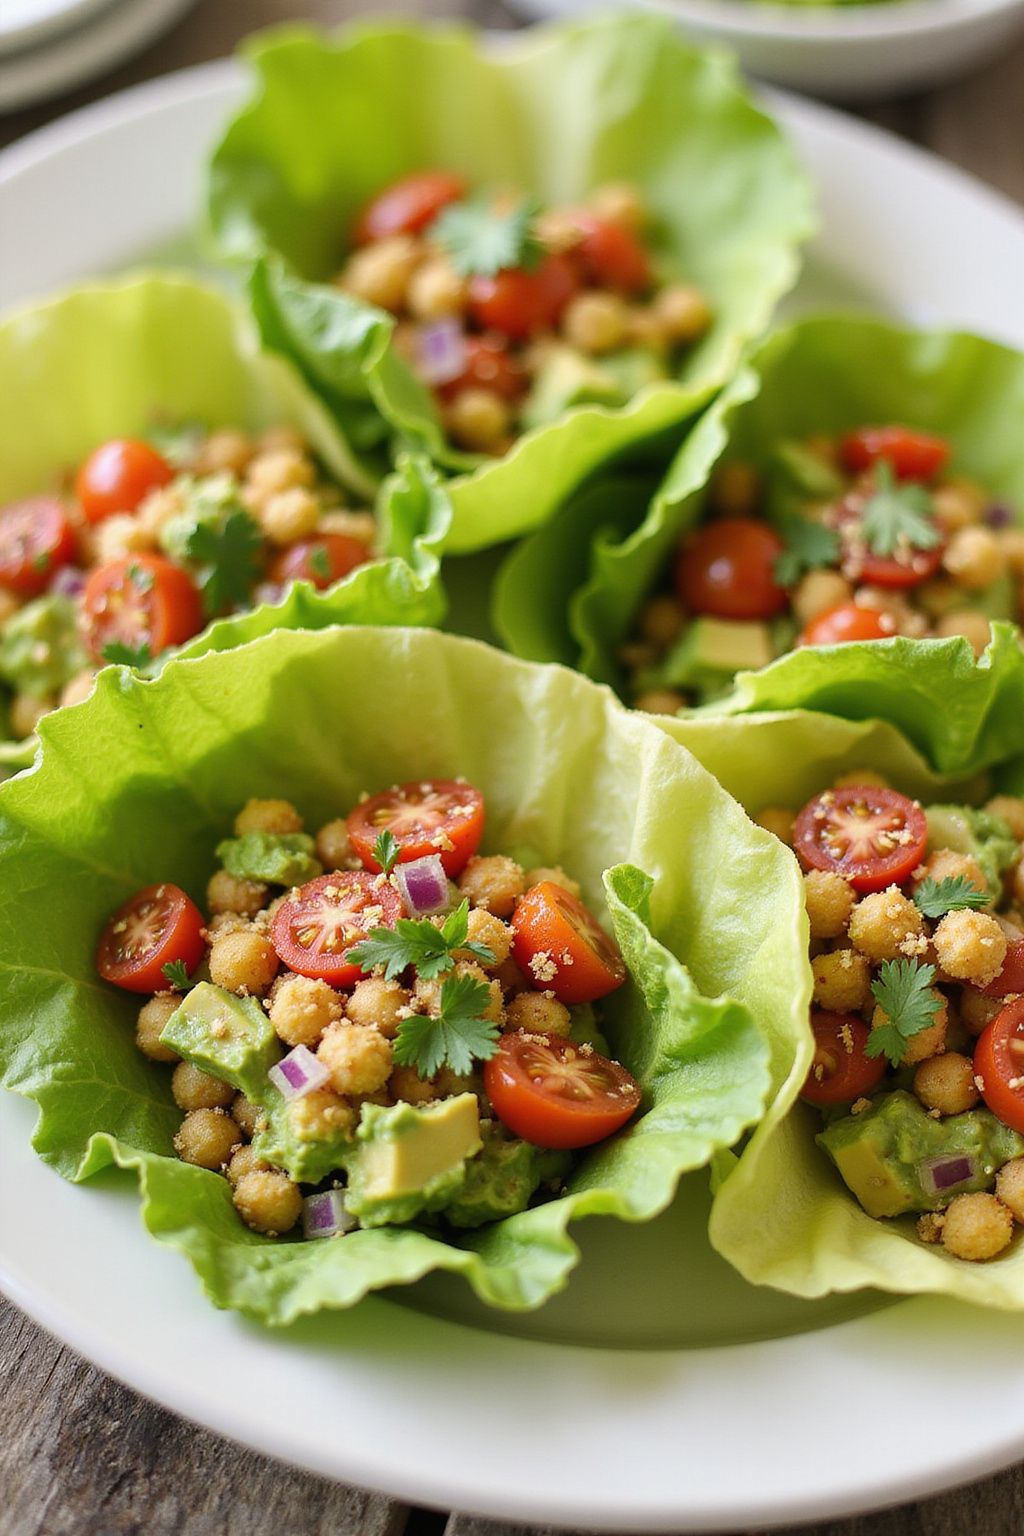
Crispy Chickpea and Avocado Salad Cups are a fun and healthy snack perfect for spring. These little cups are filled with crunchy chickpeas and creamy avocado, making them a delightful treat. Serve them as appetizers or enjoy them as a light meal!
Prep Time: 15 minutes
Total Time: 15 minutes
Servings: 4
Ingredients:
- 1 can (15 oz) chickpeas, drained and rinsed
- 1 tablespoon olive oil
- 1 teaspoon paprika
- 1/2 teaspoon garlic powder
- 1/4 teaspoon salt
- 1 ripe avocado, diced
- 1/2 cup cherry tomatoes, halved
- 1/4 cup red onion, finely chopped
- 2 tablespoons fresh cilantro, chopped
- Juice of 1 lime
- 8 small lettuce leaves (for cups)
Instructions:
First, preheat your oven to 400°F (200°C). This will help make the chickpeas nice and crispy. In a bowl, mix the chickpeas with the olive oil, paprika, garlic powder, and salt. Stir well until all the chickpeas are coated.
Spread the seasoned chickpeas on a baking sheet in a single layer. Bake them in the preheated oven for about 20 to 25 minutes. Shake the pan halfway through to get them crispy on all sides.
While the chickpeas are baking, prepare the salad mixture. In a separate bowl, combine the diced avocado, cherry tomatoes, red onion, cilantro, and lime juice. Gently stir to mix everything without mashing the avocado.
Once the chickpeas are crispy and golden, take them out of the oven and let them cool for a few minutes. Now, it’s time to assemble the cups! Take a lettuce leaf and add a scoop of the avocado mixture. Top it with a few crispy chickpeas for that perfect crunch.
Repeat this process with the remaining lettuce leaves and serve the salad cups immediately. Enjoy the fresh flavors and textures!
Tips:
- For an extra kick, sprinkle some red pepper flakes on top of the salad cups.
- You can replace chickpeas with black beans for a different flavor!
- If you have leftovers, store the avocado mixture in an airtight container and eat it within a day.
Nutrition Facts:
- Calories: 200 per serving
- Protein: 8g
- Carbohydrates: 22g
- Fat: 10g
- Fiber: 6g
14 Sweet Potato Rounds with Chickpea Salad

Sweet Potato Rounds with Chickpea Salad are a delicious and healthy appetizer that’s perfect for any occasion. These crispy sweet potato rounds topped with a zesty chickpea salad will impress your friends and family. Plus, they are easy to make!
Prep Time: 20 minutes
Total Time: 40 minutes
Servings: 4
Ingredients:
- 2 large sweet potatoes
- 1 can (15 oz) chickpeas, rinsed and drained
- 1/2 cup red bell pepper, diced
- 1/4 cup red onion, finely chopped
- 1/4 cup fresh parsley, chopped
- 2 tablespoons olive oil
- 1 tablespoon lemon juice
- 1 teaspoon cumin
- Salt and pepper, to taste
Instructions:
First, preheat your oven to 400°F (200°C). While the oven is heating up, slice the sweet potatoes into 1/2-inch rounds. Place them on a baking sheet and drizzle with a little olive oil. Sprinkle with salt and pepper.
Bake the sweet potato rounds for about 20 minutes or until they are tender and slightly crispy. Flip the rounds halfway through cooking for even browning.
Meanwhile, in a bowl, combine the chickpeas, red bell pepper, red onion, parsley, olive oil, lemon juice, cumin, salt, and pepper. Mix everything together until it’s well combined. Taste the salad and adjust the seasoning if needed.
Once the sweet potato rounds are done baking, let them cool for a few minutes. Then, top each round with a generous spoonful of the chickpea salad.
Serve immediately and enjoy your vibrant appetizer!
Tips:
- You can roast sweet potato rounds ahead of time and reheat them before serving for convenience.
- Feel free to customize the chickpea salad by adding your favorite veggies or herbs.
- For an extra kick, add a pinch of chili powder or cayenne to the chickpea salad.
Nutrition Facts:
- Calories: 250
- Protein: 8g
- Carbohydrates: 39g
- Fat: 9g
- Fiber: 10g
- Sodium: 320mg
15 Garlic Herb Roasted Cauliflower Florets
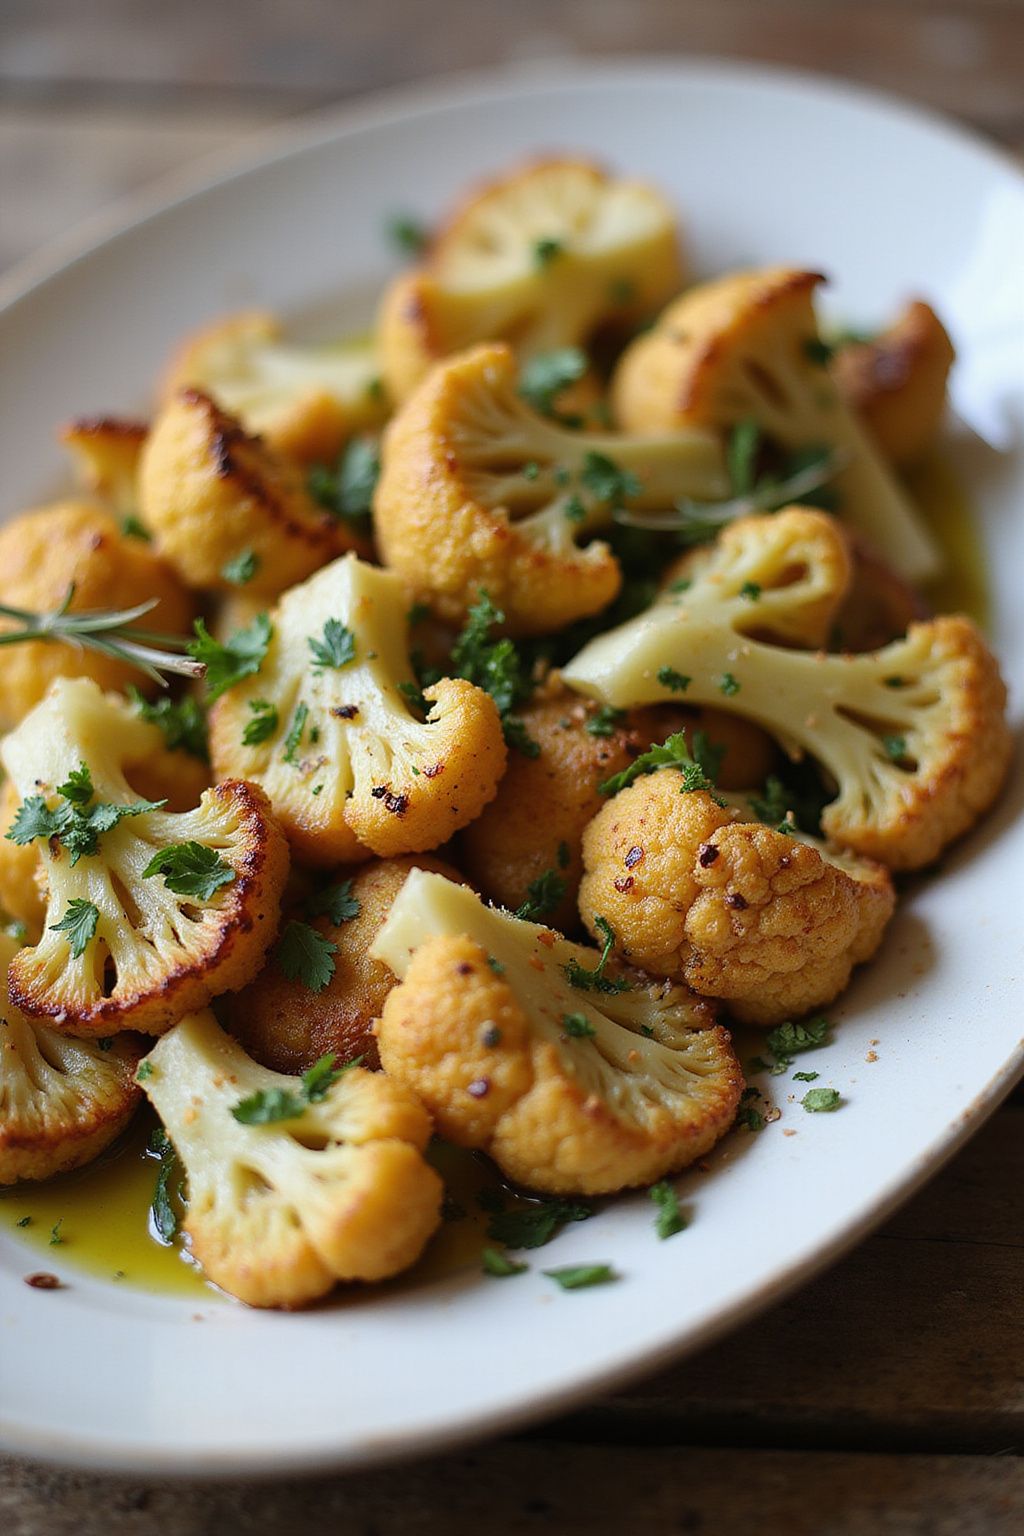
Garlic Herb Roasted Cauliflower Florets are a delicious and healthy snack that everyone will love. They are simple to make and packed with flavor. Perfect for a light spring appetizer, these roasted florets will have your taste buds dancing!
Prep Time: 10 minutes
Cook Time: 25 minutes
Total Time: 35 minutes
Servings: 4
Ingredients:
- 1 medium head of cauliflower, cut into florets
- 3 tablespoons of olive oil
- 4 cloves of garlic, minced
- 1 teaspoon of dried thyme
- 1 teaspoon of dried rosemary
- Salt and pepper, to taste
- Fresh parsley, chopped (for garnish)
Instructions:
Start by preheating your oven to 425°F (220°C). Make sure it’s nice and hot so the cauliflower gets perfectly roasted.
In a large bowl, combine the cauliflower florets with olive oil, minced garlic, dried thyme, dried rosemary, salt, and pepper. Toss everything together until the florets are well coated with the oil and spices.
Spread the cauliflower in a single layer on a baking sheet. Ensure there is space between the pieces so they can roast evenly. Place the baking sheet in the oven and roast for about 25 minutes.
After 25 minutes, check on your cauliflower. It should be golden brown and tender. If necessary, you can roast it for a few extra minutes for a crispier texture.
Once done, remove them from the oven and let them cool slightly. Before serving, sprinkle with fresh parsley for an extra pop of color and flavor. Enjoy your Garlic Herb Roasted Cauliflower Florets warm or at room temperature!
Tips:
- For extra flavor, try adding red pepper flakes for a little heat.
- Serve these roasted florets with a side of yogurt dip or hummus for a tasty snack.
- You can prep the cauliflower ahead of time and refrigerate it until you’re ready to roast.
Nutrition Facts:
- Calories: 120
- Protein: 4g
- Fat: 10g
- Carbohydrates: 8g
- Fiber: 3g
- Sugar: 2g
16 Scallop Ceviche with Citrus Salsa
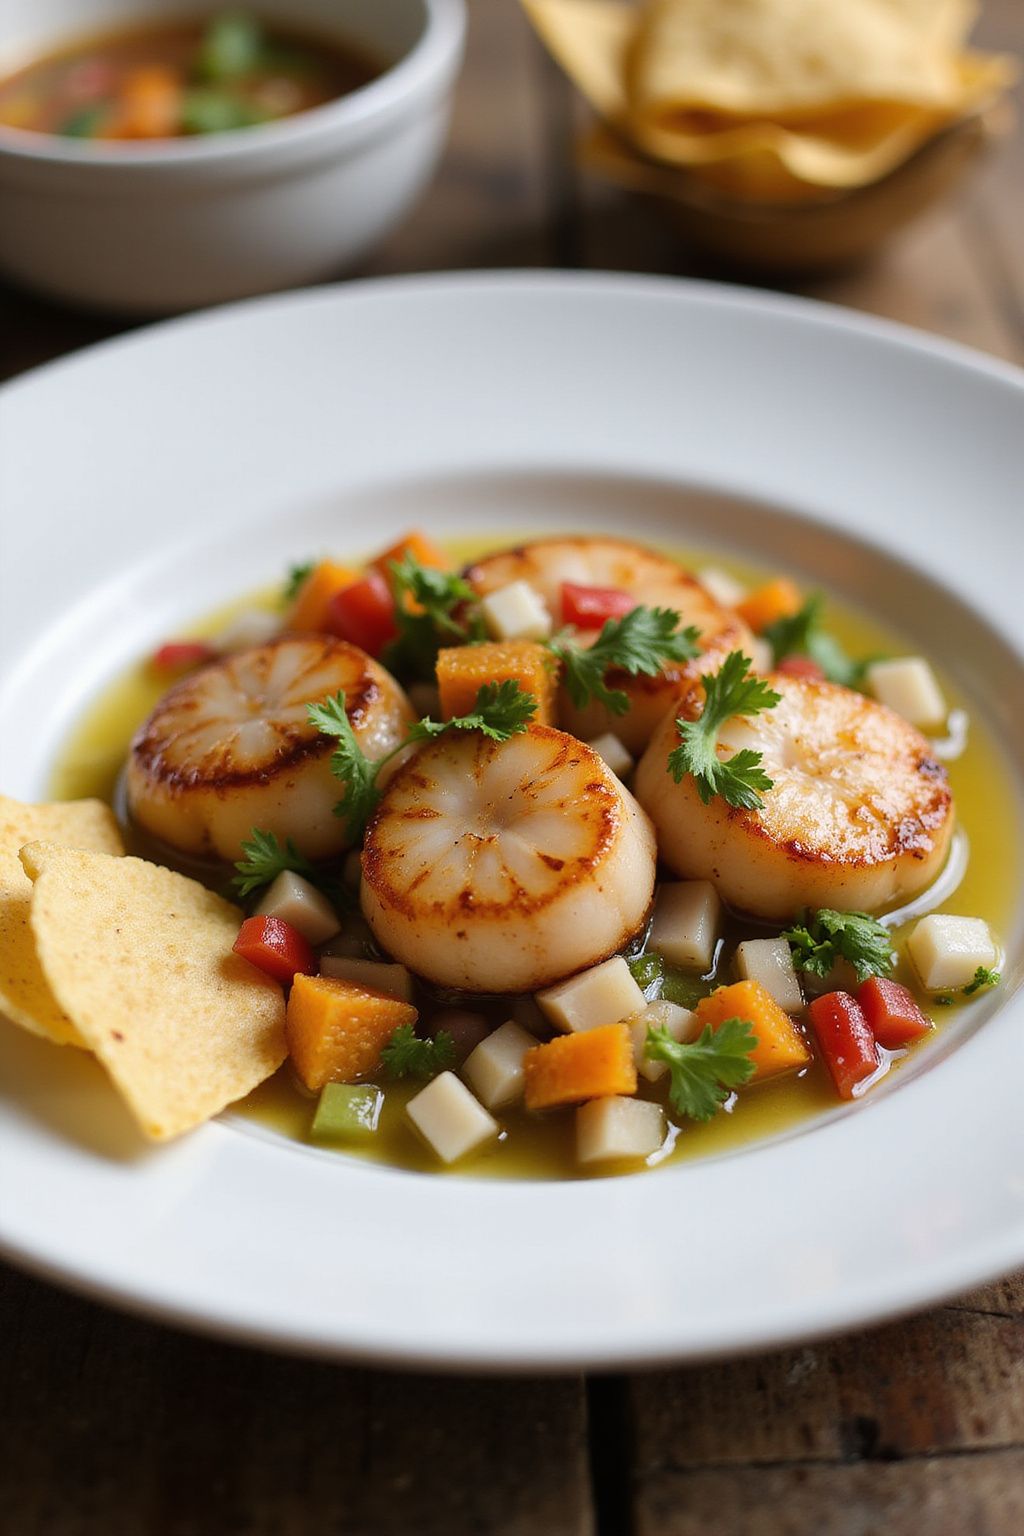
Scallop Ceviche with Citrus Salsa is a fresh and delicious dish perfect for spring. The combination of tender scallops and zesty citrus makes it a light, yet flavorful appetizer. You’ll love how simple it is to prepare!
Prep Time: 15 minutes
Additional Time: 30 minutes
Total Time: 45 minutes
Servings: 4
Ingredients:
- 1 pound fresh scallops, cleaned and diced
- Juice of 3 limes
- Juice of 1 lemon
- 1 orange, peeled and diced
- 1 small red onion, finely chopped
- 1 jalapeño pepper, seeded and finely chopped
- 1/4 cup fresh cilantro, chopped
- Salt and pepper to taste
- Tortilla chips or lettuce leaves for serving
Instructions:
Start by placing the diced scallops into a mixing bowl. Squeeze the lime juice and lemon juice over the scallops, making sure they are completely covered. This will "cook" the scallops with the citrus, so add a good amount.
Next, cover the bowl with plastic wrap and let it sit in the refrigerator for about 30 minutes. This allows the flavors to blend together and the scallops to firm up a bit.
While the scallops are marinating, prepare the citrus salsa. In another mixing bowl, combine the diced orange, red onion, jalapeño, and cilantro. Toss everything together until well mixed.
Once the scallops are ready, drain any excess citrus juice. Fold the citrus salsa into the scallops gently. Season with salt and pepper to taste. This adds a nice touch of flavor to the ceviche.
Serve the Scallop Ceviche immediately using tortilla chips or lettuce leaves for scooping. Enjoy this refreshing appetizer with friends!
Tips:
- For extra flavor, try adding diced avocado to the salsa.
- If you prefer a milder ceviche, reduce the amount of jalapeño or omit it entirely.
- Always use the freshest scallops you can find for the best taste.
Nutrition Facts:
- Calories: 150
- Protein: 25g
- Fat: 2g
- Carbohydrates: 6g
- Fiber: 1g
- Sugar: 2g
17 Beet and Arugula Salad with Citrus Vinaigrette
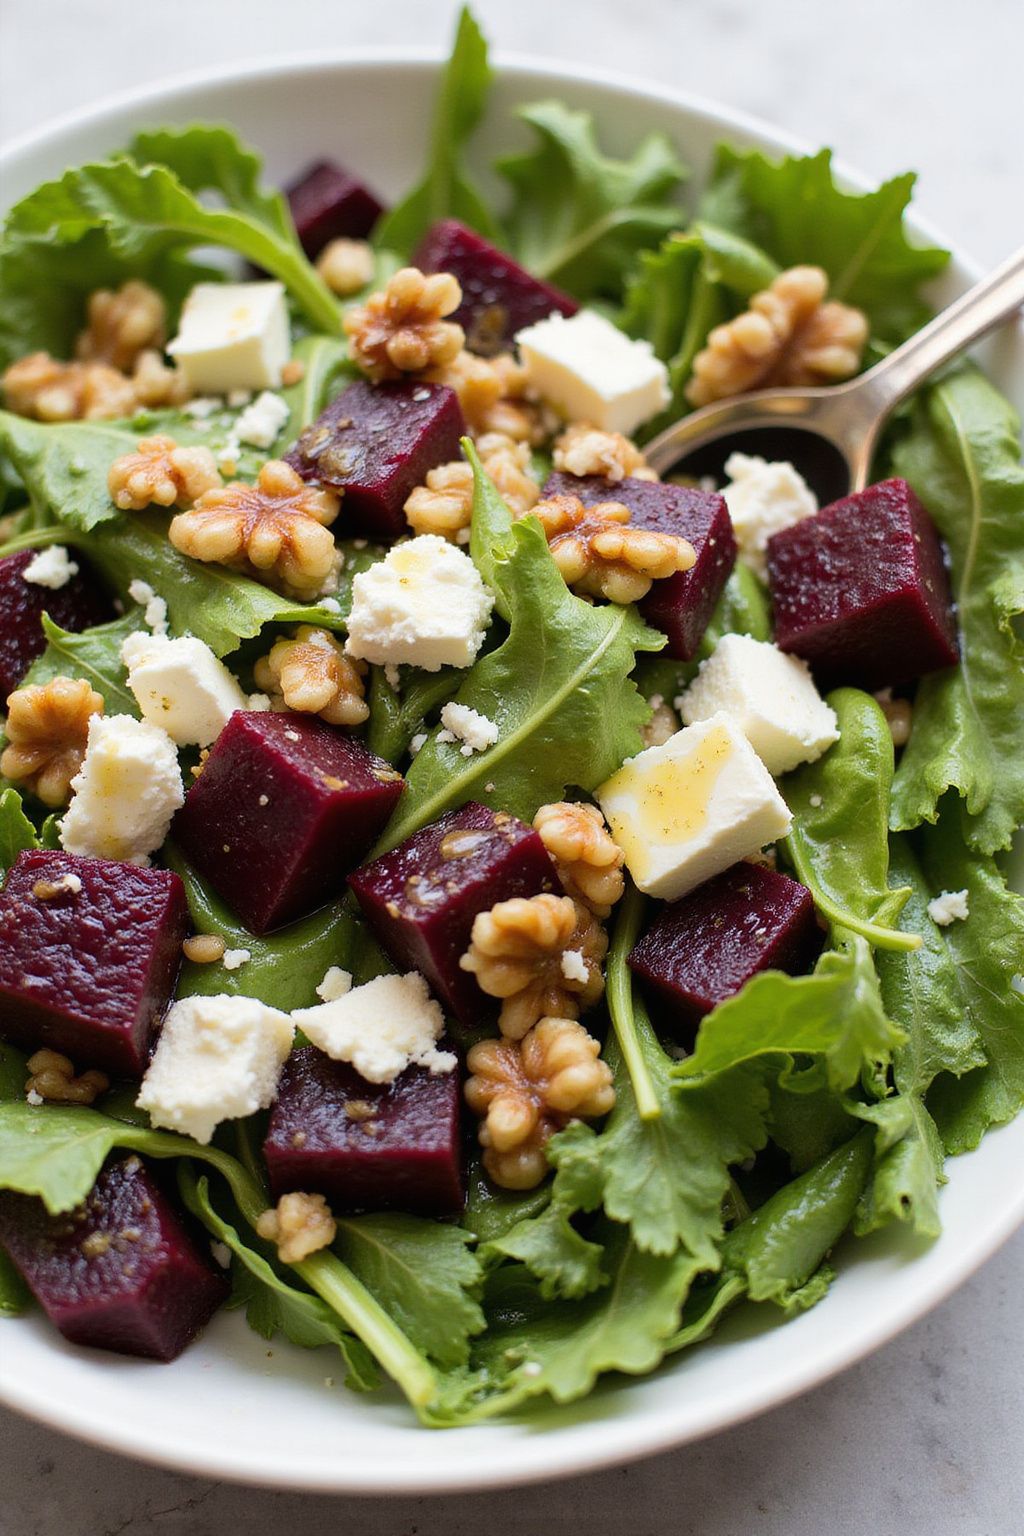
This Beet and Arugula Salad with Citrus Vinaigrette is a refreshing and colorful dish that is perfect for spring. The earthy sweetness of roasted beets pairs perfectly with the peppery arugula, while the citrus vinaigrette adds a zesty kick. Enjoy this salad as a light appetizer or a healthy side dish!
Prep Time: 15 minutes
Total Time: 15 minutes
Servings: 4
Ingredients:
- 4 cups arugula
- 2 medium beets, roasted and diced
- 1/4 cup crumbled feta cheese
- 1/4 cup walnuts, chopped
- 1/4 cup olive oil
- 2 tablespoons fresh orange juice
- 1 tablespoon fresh lemon juice
- 1 teaspoon honey
- Salt and pepper to taste
Instructions:
Start by roasting the beets. Preheat your oven to 400°F (200°C) and wrap the beets in aluminum foil. Place them on a baking sheet and roast for about 45 minutes, or until they are tender. Once done, let them cool, peel the skins off, and dice them.
While the beets are roasting, prepare the citrus vinaigrette. In a small bowl, combine the olive oil, orange juice, lemon juice, and honey. Whisk them together until well mixed. Season with salt and pepper to taste.
In a large bowl, add the arugula. Top it with the roasted and diced beets, crumbled feta cheese, and chopped walnuts. Drizzle the citrus vinaigrette over the salad, and gently toss everything together until coated.
Serve immediately and enjoy the fresh flavors!
Tips:
- For extra flavor, add sliced avocado or thinly sliced red onion to the salad.
- Make your vinaigrette ahead of time and store it in the refrigerator for up to a week.
- If you want a sweeter touch, consider adding slices of fresh orange to the salad.
Nutrition Facts:
- Calories: 220
- Protein: 5g
- Carbohydrates: 15g
- Fat: 18g
- Fiber: 4g
- Sugars: 4g
18 Herbed Goat Cheese and Melon Skewers
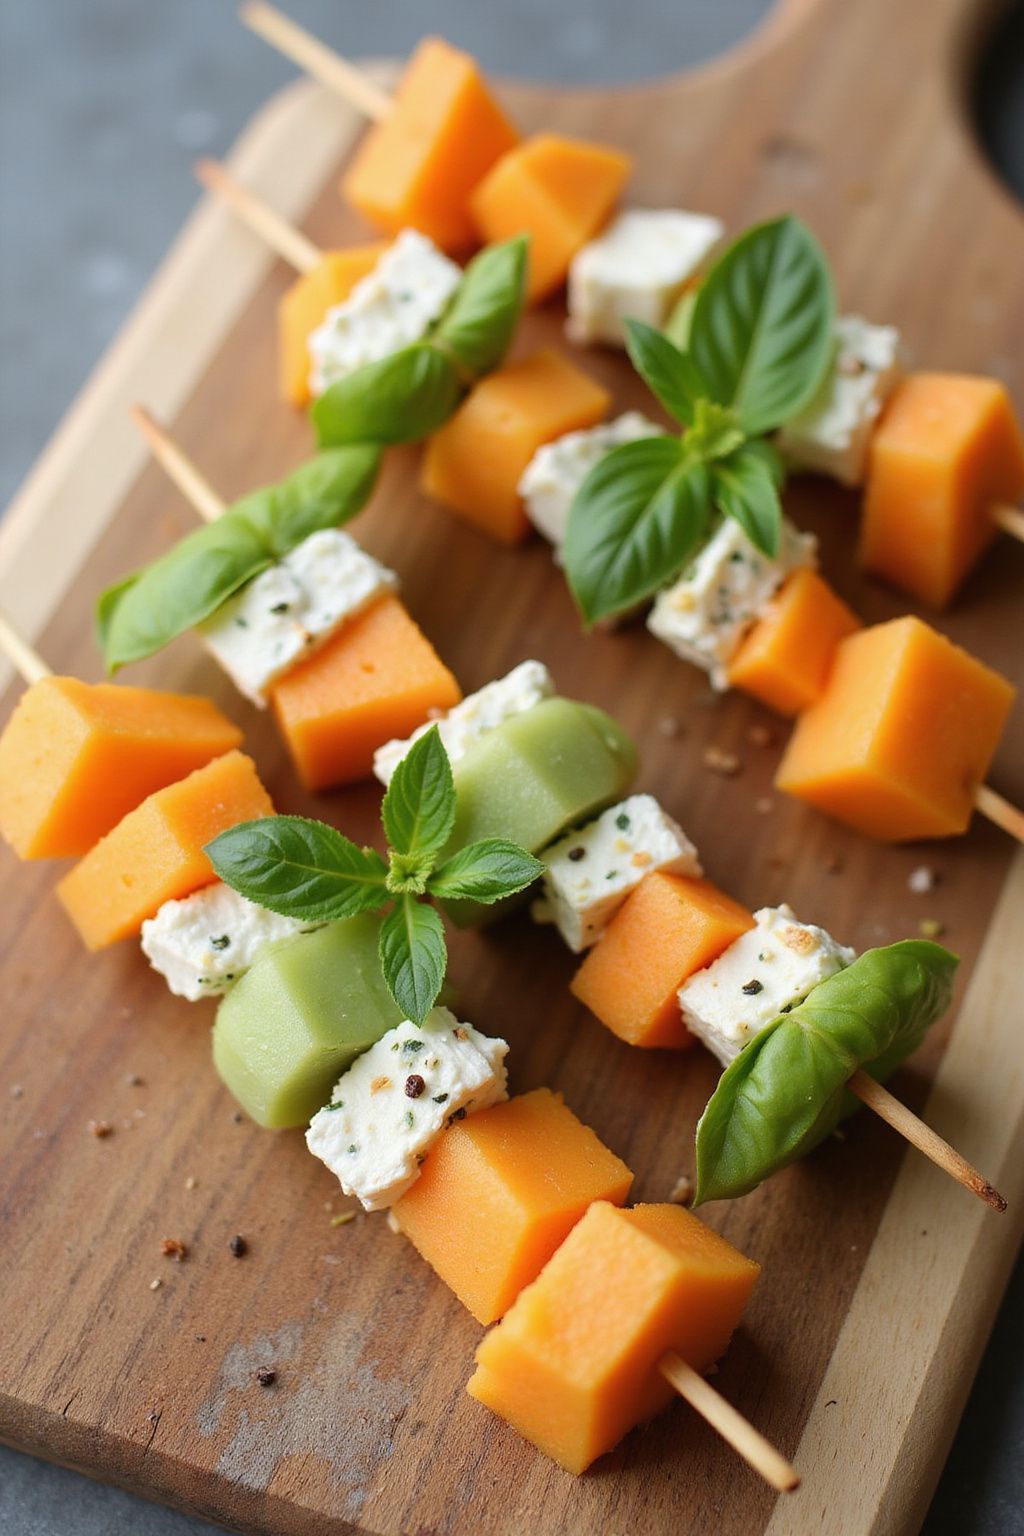
Herbed Goat Cheese and Melon Skewers are a delightful and refreshing appetizer, perfect for spring gatherings! The sweet melon pairs wonderfully with the creamy, herbed goat cheese, making each bite delicious. These easy-to-make skewers are not just pleasing to the palate but also visually appealing.
Prep Time: 15 minutes
Total Time: 15 minutes
Servings: 6
Ingredients:
- 1 cup herbed goat cheese, softened
- 1 ripe cantaloupe, cut into bite-sized cubes
- 1 ripe honeydew melon, cut into bite-sized cubes
- Fresh basil leaves for garnish
- Wooden skewers or toothpicks
Instructions:
Start by preparing your melons. Cut the cantaloupe and honeydew melon into bite-sized cubes. You want them to be big enough to hold, but small enough to enjoy in one bite.
Next, take a wooden skewer or toothpick. Begin by sliding on a piece of cantaloupe, followed by a scoop of herbed goat cheese. Press the cheese gently to help it stick. After that, add a piece of honeydew melon. Repeat this process until the skewer is filled, leaving a little room at the end for holding.
Once all your skewers are assembled, arrange them on a serving platter. For a lovely touch, garnish the skewers with fresh basil leaves. This will add a beautiful pop of green and an aromatic fragrance.
Serve the Herbed Goat Cheese and Melon Skewers immediately for the best taste. They’re perfect for parties or as a light snack!
Tips:
- If you want to add a little sweetness, drizzle some honey on the skewers before serving.
- Use a mix of melons for colorful skewers; watermelon also works great!
- You can prepare the skewers ahead of time. Just cover them with plastic wrap and refrigerate until ready to serve.
Nutrition Facts:
- Calories: 150 per serving
- Protein: 5g
- Fat: 10g
- Carbohydrates: 12g
- Fiber: 1g
- Sugar: 8g
19 Radicchio Leaves with Pomegranate and Feta
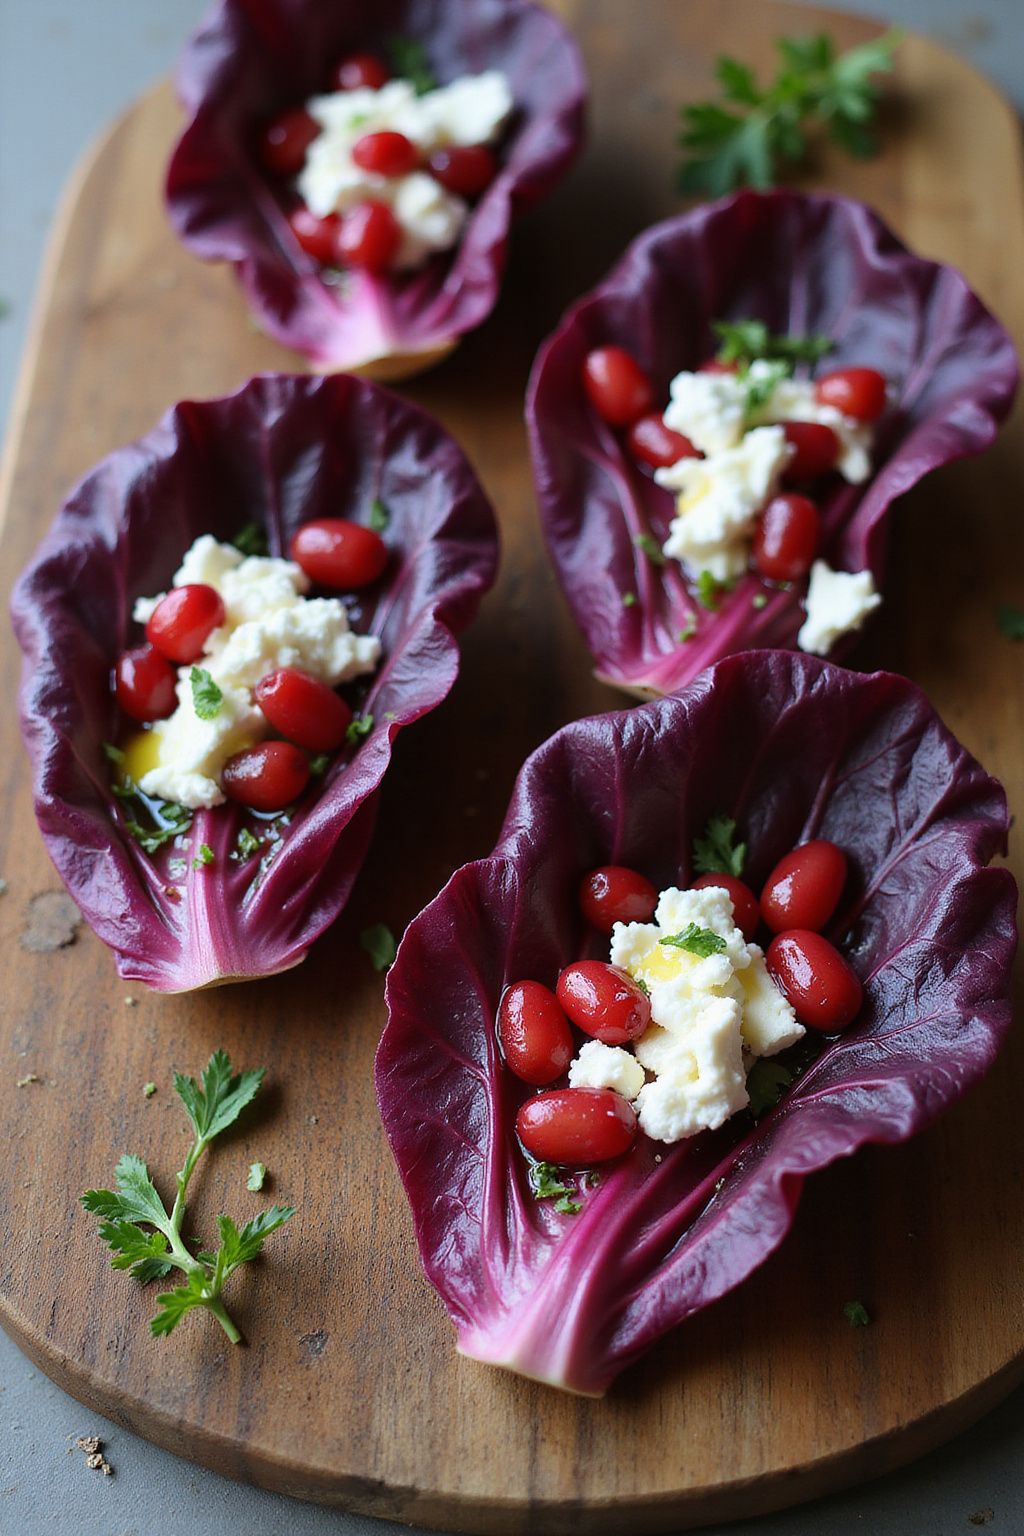
Enjoy a refreshing bite with Radicchio Leaves with Pomegranate and Feta. This dish brings a delightful mix of flavors, combining the slightly bitter taste of radicchio with the sweetness of pomegranate and the creaminess of feta cheese. It’s perfect as a light spring appetizer!
Prep Time: 10 minutes
Total Time: 10 minutes
Servings: 4
Ingredients:
- 1 head of radicchio
- 1 cup of pomegranate seeds
- 1/2 cup of crumbled feta cheese
- 2 tablespoons of olive oil
- 1 tablespoon of balsamic vinegar
- Salt and pepper to taste
- Fresh herbs (like mint or parsley) for garnish (optional)
Instructions:
Start by rinsing the radicchio under cold water. Shake off excess water and gently pat dry with a paper towel. Carefully separate the leaves, being cautious not to tear them.
In a large bowl, mix the pomegranate seeds and crumbled feta cheese together. This combination will give a burst of color and flavor!
Next, drizzle the olive oil and balsamic vinegar over the mixture. Sprinkle in some salt and pepper to taste. Toss everything gently to avoid crushing the fragile pomegranate seeds.
Now, arrange the radicchio leaves on a serving plate. Spoon the pomegranate and feta mixture onto the leaves.
Finally, if you want to add an extra touch, garnish with fresh herbs like mint or parsley. Serve immediately and enjoy this beautiful and tasty appetizer!
Tips:
- For added crunch, consider topping with toasted walnuts or pecans.
- You can make the filling ahead of time, but assemble just before serving for the best texture.
- Experiment with different types of cheese, such as goat cheese, if you prefer a different flavor.
Nutrition Facts:
- Calories: 150 per serving
- Protein: 6g
- Fat: 12g
- Carbohydrates: 8g
- Fiber: 2g
- Sugar: 2g
20 Artichoke and Spinach Dip with Pita Chips
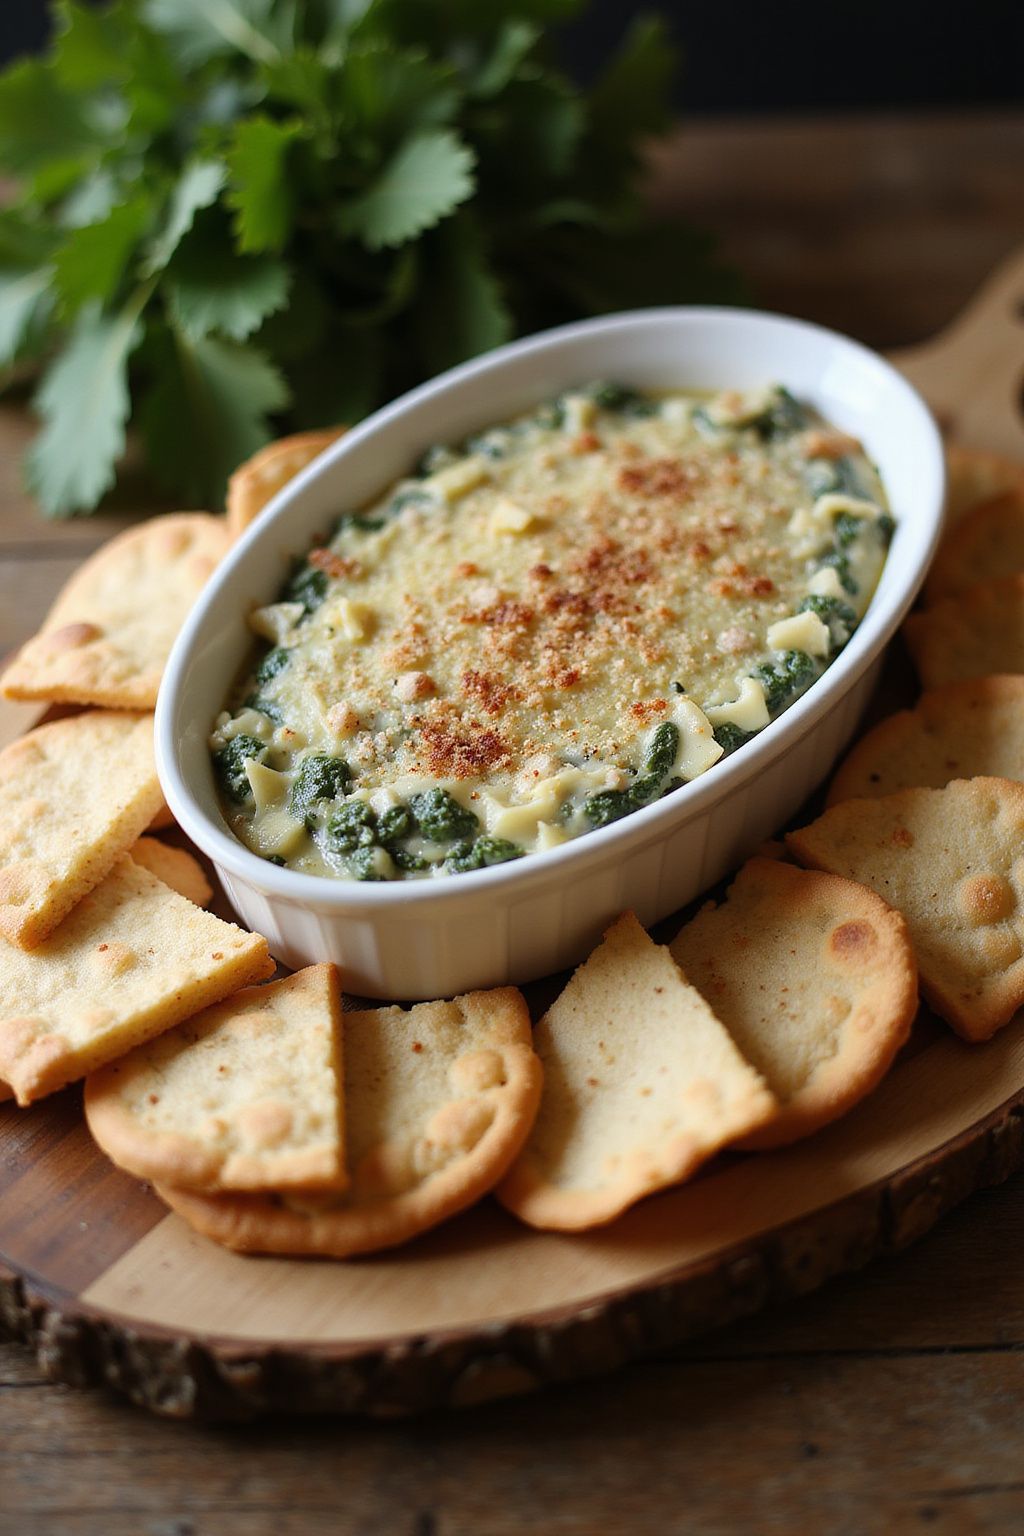
Get ready to impress your friends with this creamy and delicious Artichoke and Spinach Dip served with crispy homemade Pita Chips! This dip is perfect for any gathering and is super easy to make. Your guests won’t be able to get enough!
Prep Time: 15 minutes
Cook Time: 25 minutes
Total Time: 40 minutes
Servings: 6-8 servings
Ingredients:
- 1 can (14 oz) artichoke hearts, drained and chopped
- 1 cup frozen spinach, thawed and squeezed dry
- 1 cup cream cheese, softened
- 1/2 cup sour cream
- 1/2 cup mayonnaise
- 1 cup shredded mozzarella cheese
- 1/4 cup grated Parmesan cheese
- 2 cloves garlic, minced
- 1/2 tsp salt
- 1/2 tsp black pepper
- 1/2 tbsp lemon juice
- 4 large pita breads, cut into triangles
- Olive oil for brushing
Instructions:
First, preheat your oven to 350°F (175°C). This will help get the dip nice and bubbly. In a mixing bowl, combine the chopped artichoke hearts, thawed spinach, and minced garlic. Stir them together well.
Next, add the cream cheese, sour cream, mayonnaise, mozzarella cheese, Parmesan cheese, salt, black pepper, and lemon juice into the bowl. Mix until everything is creamy and combined.
Transfer this mixture into a baking dish and spread it out evenly. Place the dish in the preheated oven and bake for about 25 minutes, or until the dip is hot and the top is slightly golden.
While the dip is baking, prepare the pita chips. Place the pita triangles on a baking sheet and brush them lightly with olive oil. You can sprinkle a little salt on top if you like. Bake them in the oven for about 10 minutes until they are crispy.
Once the dip is ready and the pita chips are golden, remove them from the oven. Allow the dip to cool for a few minutes before serving. Enjoy your Artichoke and Spinach Dip paired with crispy Pita Chips!
Tips:
- For extra flavor, add a pinch of red pepper flakes to the dip mixture.
- You can also use fresh spinach instead of frozen; just sauté it first to reduce moisture.
- Serve the dip with additional veggies like carrots and bell peppers for a colorful platter.
Nutrition Facts:
- Calories: 280 per serving
- Total Fat: 20g
- Saturated Fat: 7g
- Cholesterol: 35mg
- Sodium: 350mg
- Total Carbohydrates: 15g
- Dietary Fiber: 2g
- Sugars: 1g
- Protein: 8g


